Use cases
While ELNX is a versatile tool that can be used in many different ways, we designed its features with a certain conception in mind. These use cases will guide you through the anticipated applications and highlight useful features.
Structure your notebook
Although the structure of the notebook is fully up to the user's preference (or the project's needs), it is always helpful to see how other people deal with it.
The first instance of your notebook structure is the project/notebook itself. It is advisable to set up separate notebooks for rather concise, defined projects, so that they can be shared and managed separately. One lab is typically running multiple projects in parallel.
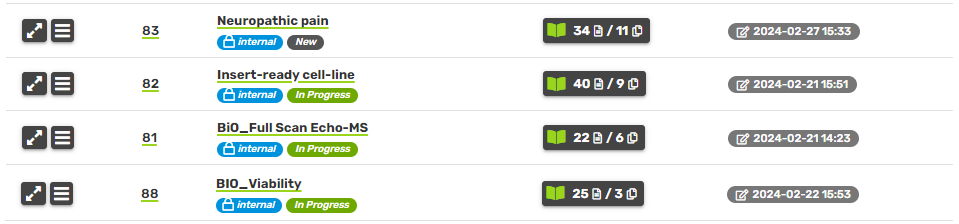
The main structuring of your notebook should be done through collections. It is possible to add a collection designated purely to the literature and background of the project, while all your experimental data will be in a separate one. It may also be useful to have a collection for presentations and reports, protocols, or future plans. These elemental sections can be numbered for easier orientation, especially if you are using similar structure for multiple projects.
.PNG)
.PNG)
.PNG)
Individual records can either be kept short by adding a new record for each new development, or there can be just one record that is being continuously prolonged. It is advisable to be somewhere between these two approaches, and not to spare with the records, as each record has useful metadata containing a time stamp and info on who created it. For one experiment, it can be useful to have one record with the protocol/experiment design, and one record describing its course and the results (even if it spans multiple days). For ongoing experiments such as cell culture maintenance, it may be more convenient to have just one long record containing notes on the progression, instead of creating a new record each time (for example date of passaging and a note). In this case, you can go through the record history to see how the versions changed.
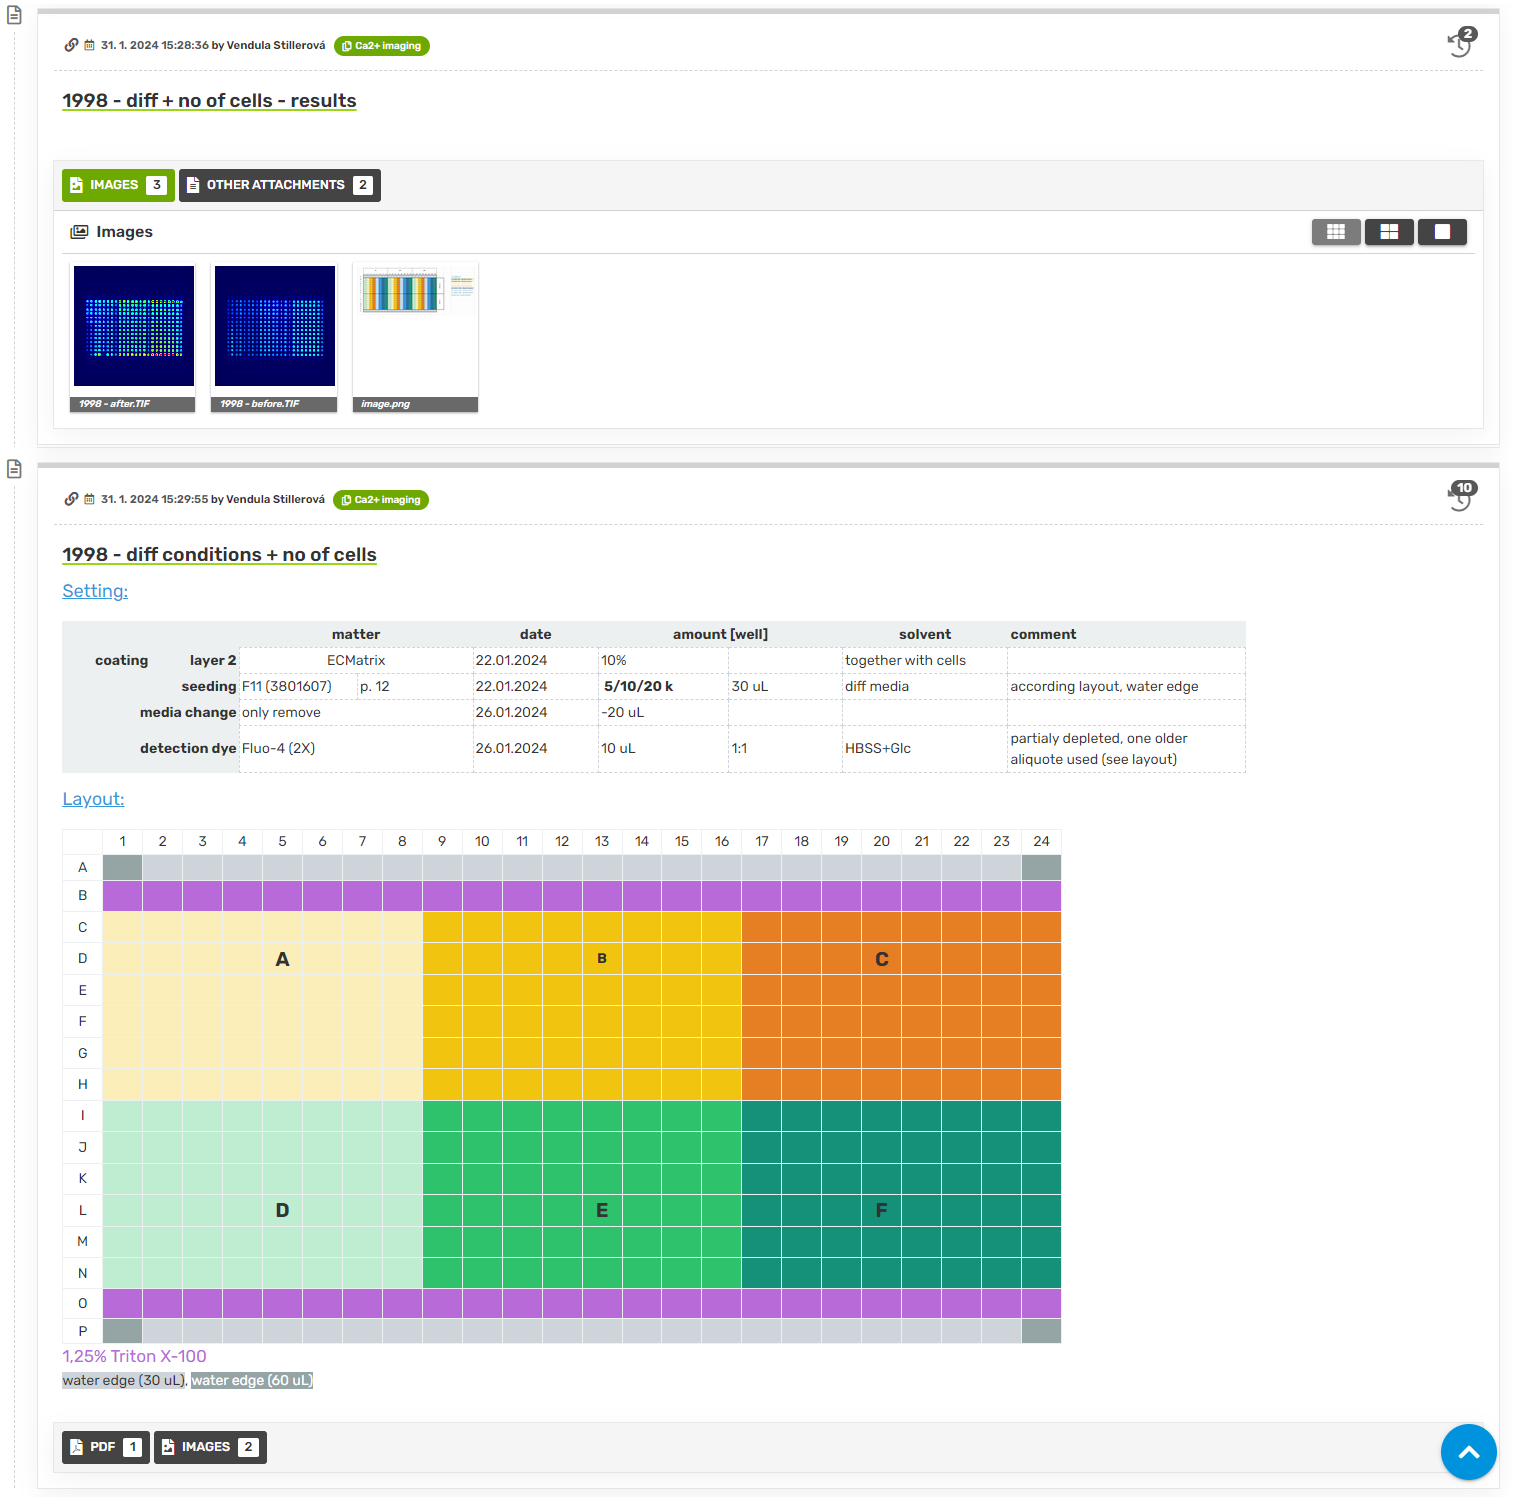
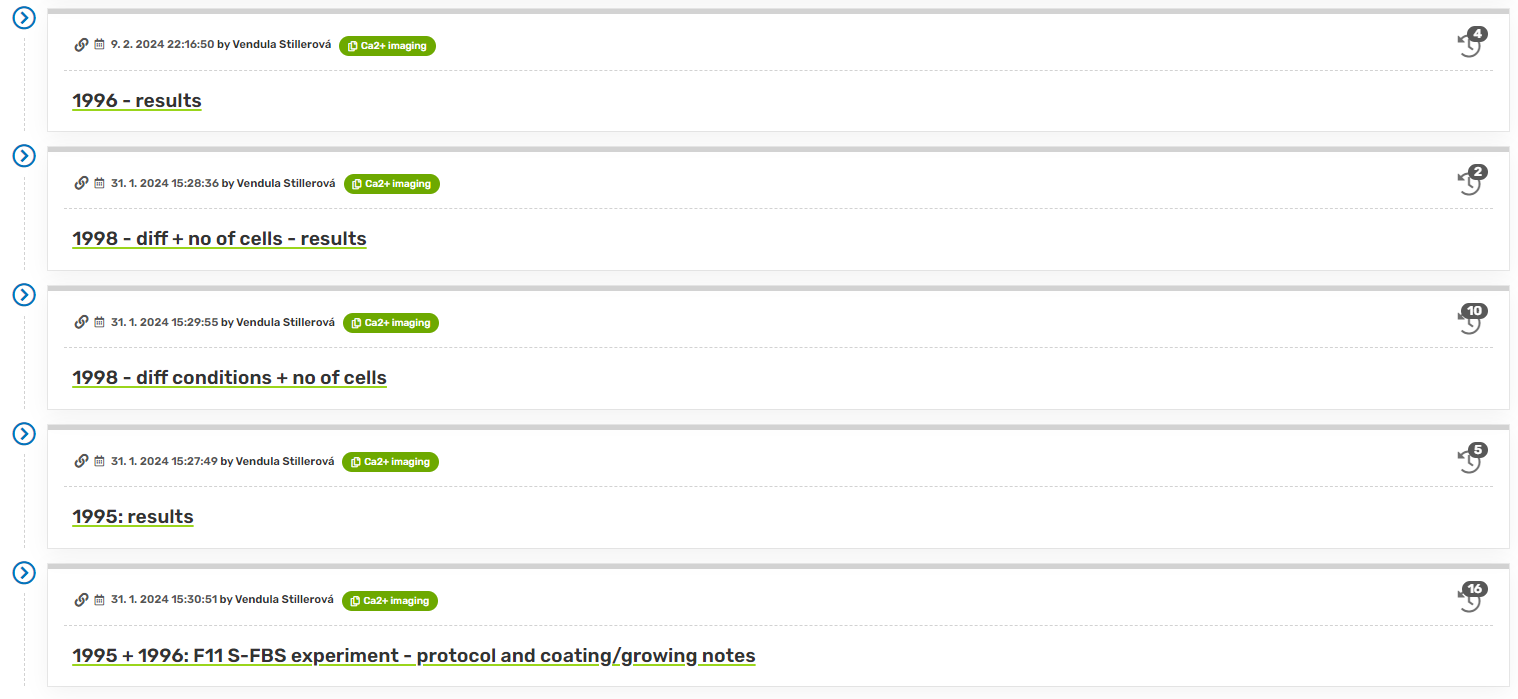
It is possible to create a separate collection for one experiment when you expect more follow-up records in it, for example for experiment optimization. Don't forget you can always rearrange your collections and records.
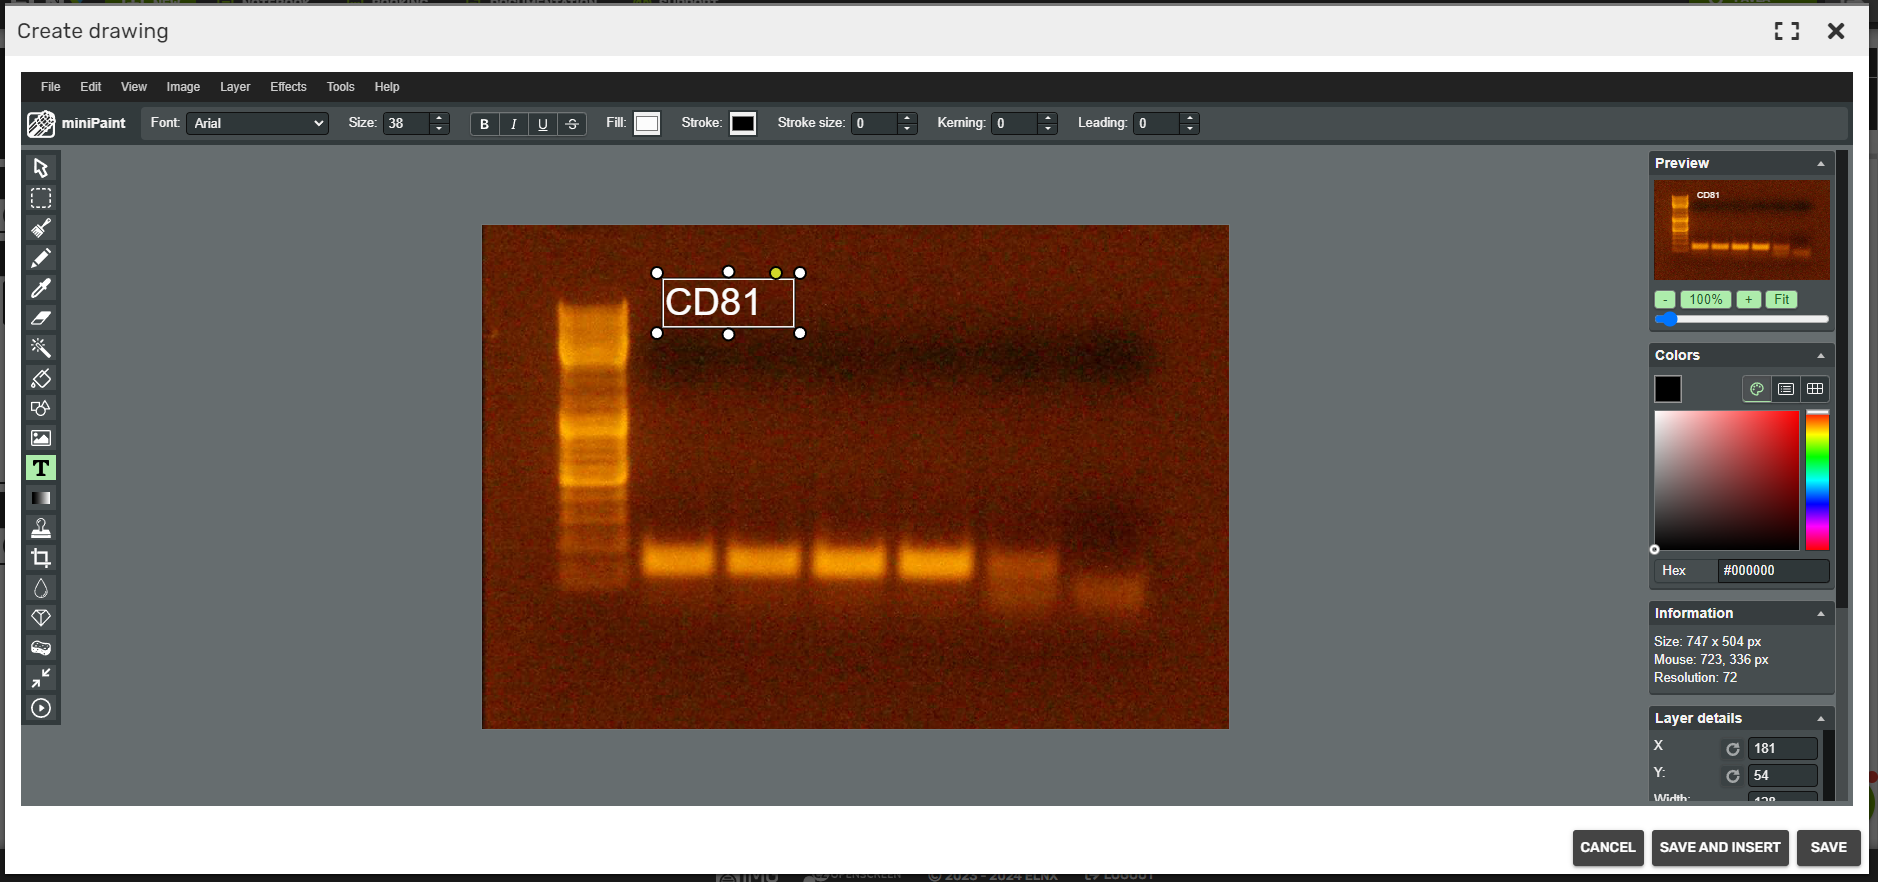
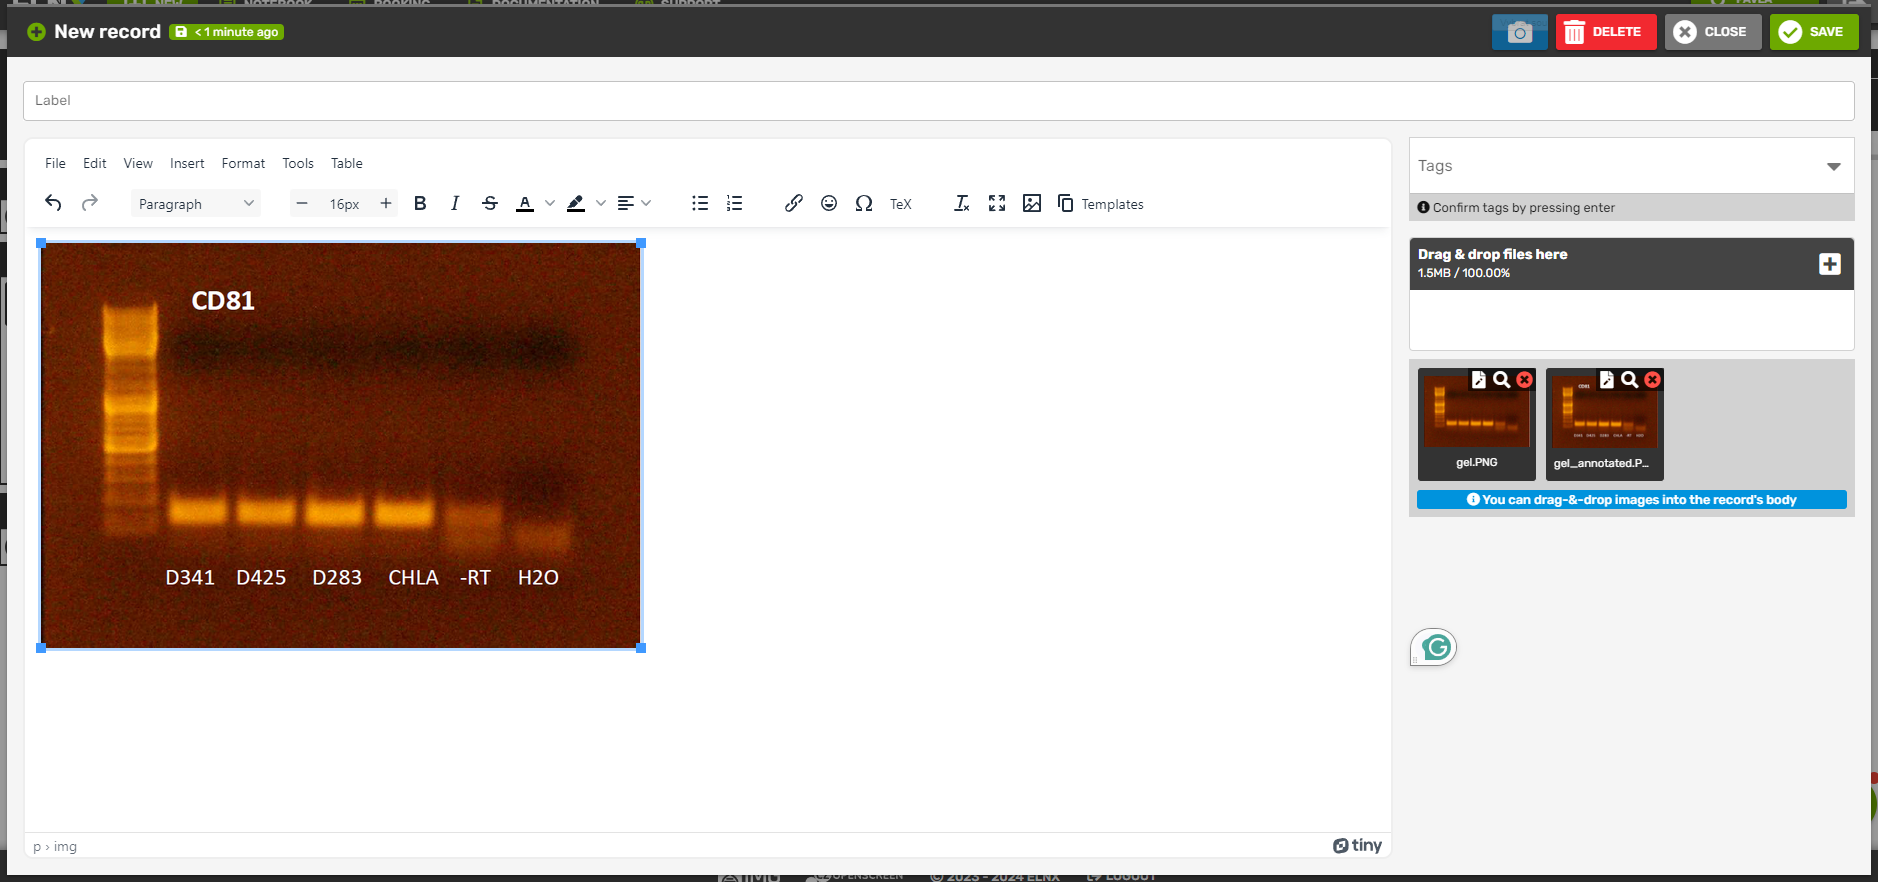
Annotate captured images
The possibility to annotate images directly in ELNX is especially helpful when capturing images with your mobile device and annotating them on the go. You can use this to annotate gels, capture your experimental setup, etc. Just click the Edit image button on the image thumbnail - this opens an image editor, where you can draw, add arrows, or write text. When saving, the edited image will be stored alongside the original raw image. You can drag and drop it into the record body.
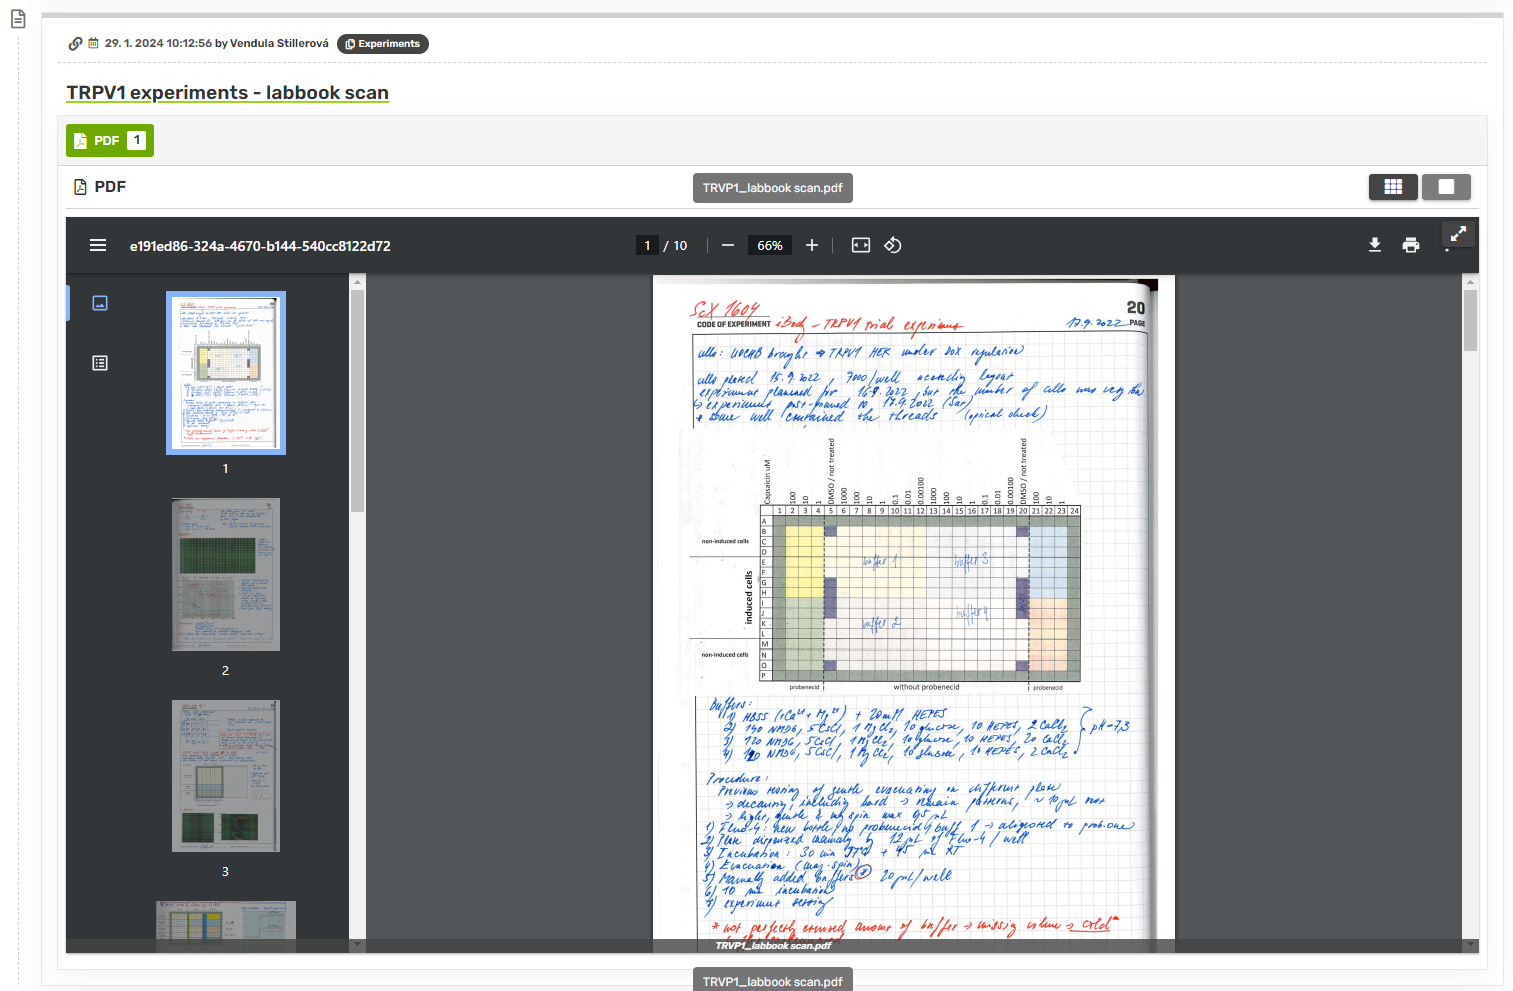
Scan hand-written notes into your notebook
Record attachments in PDF are displayed in an in-built PDF viewer, so the document can be viewed while browsing the records. Thanks to that, it is possible to scan any of your documents and add them as a free-standing record. This will be especially helpful if you want to back up your previous hand-written lab book, or prefer hand-written notes and wish to continue taking them this way. Individual pages can be sorted into collections to organize them.
Structure images using tables
To create a quick figure table, you can set up a table in your record and drag-and-drop your images into it. Annotations can be done in separate fields, as well as any other notes. Also, the borders can be hidden (or set to 0 px width) for a cleaner look. You can save your favorite table formats as record templates, so adding a new one will be even easier. The table can be viewed as a whole, or you can open individual images by clicking the icon in their upper right corner (this also works in fullscreen mode).
.PNG)
.PNG)

Create quick presentations of results
The fullscreen mode can be used to create presentations of your results in no time. Just create a new collection containing the records you want to share, by copying them from your main collection. You can reorder the records however you need. Then switch to the fullscreen mode and off you go!
.PNG)
.PNG)