Records
Notebook records consist of name (label), text body and/or file attachments. On top of that, each record has a timestamp showing when it was created, and information about which user created it. When a record is created, it can never be deleted - only new versions of the record can be created, or it can be hidden. All versions of a record are saved, including timestamps and user information. Records can be sorted into collections and freely moved between them.
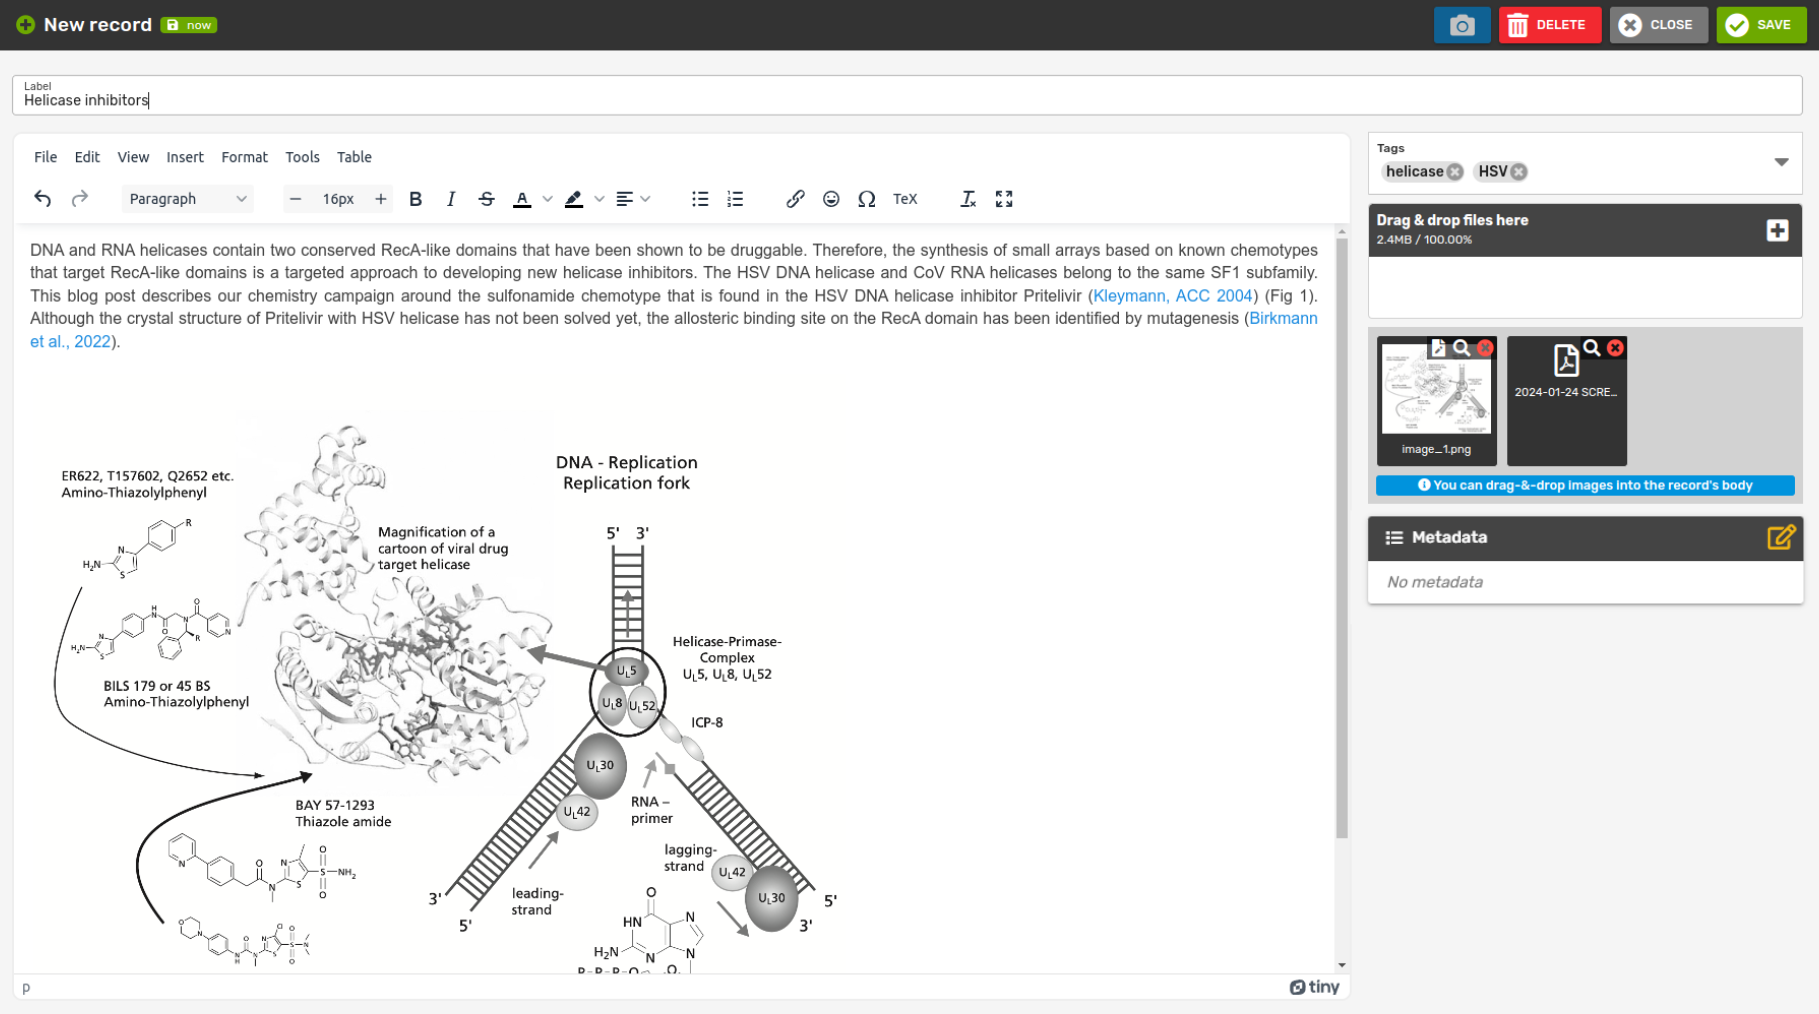
Create new record
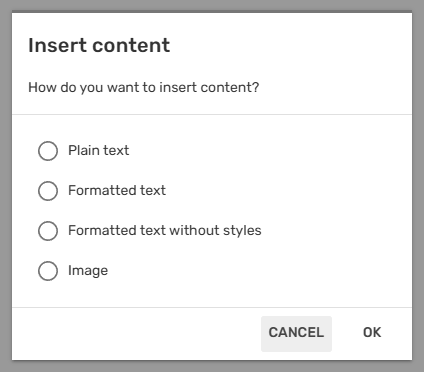
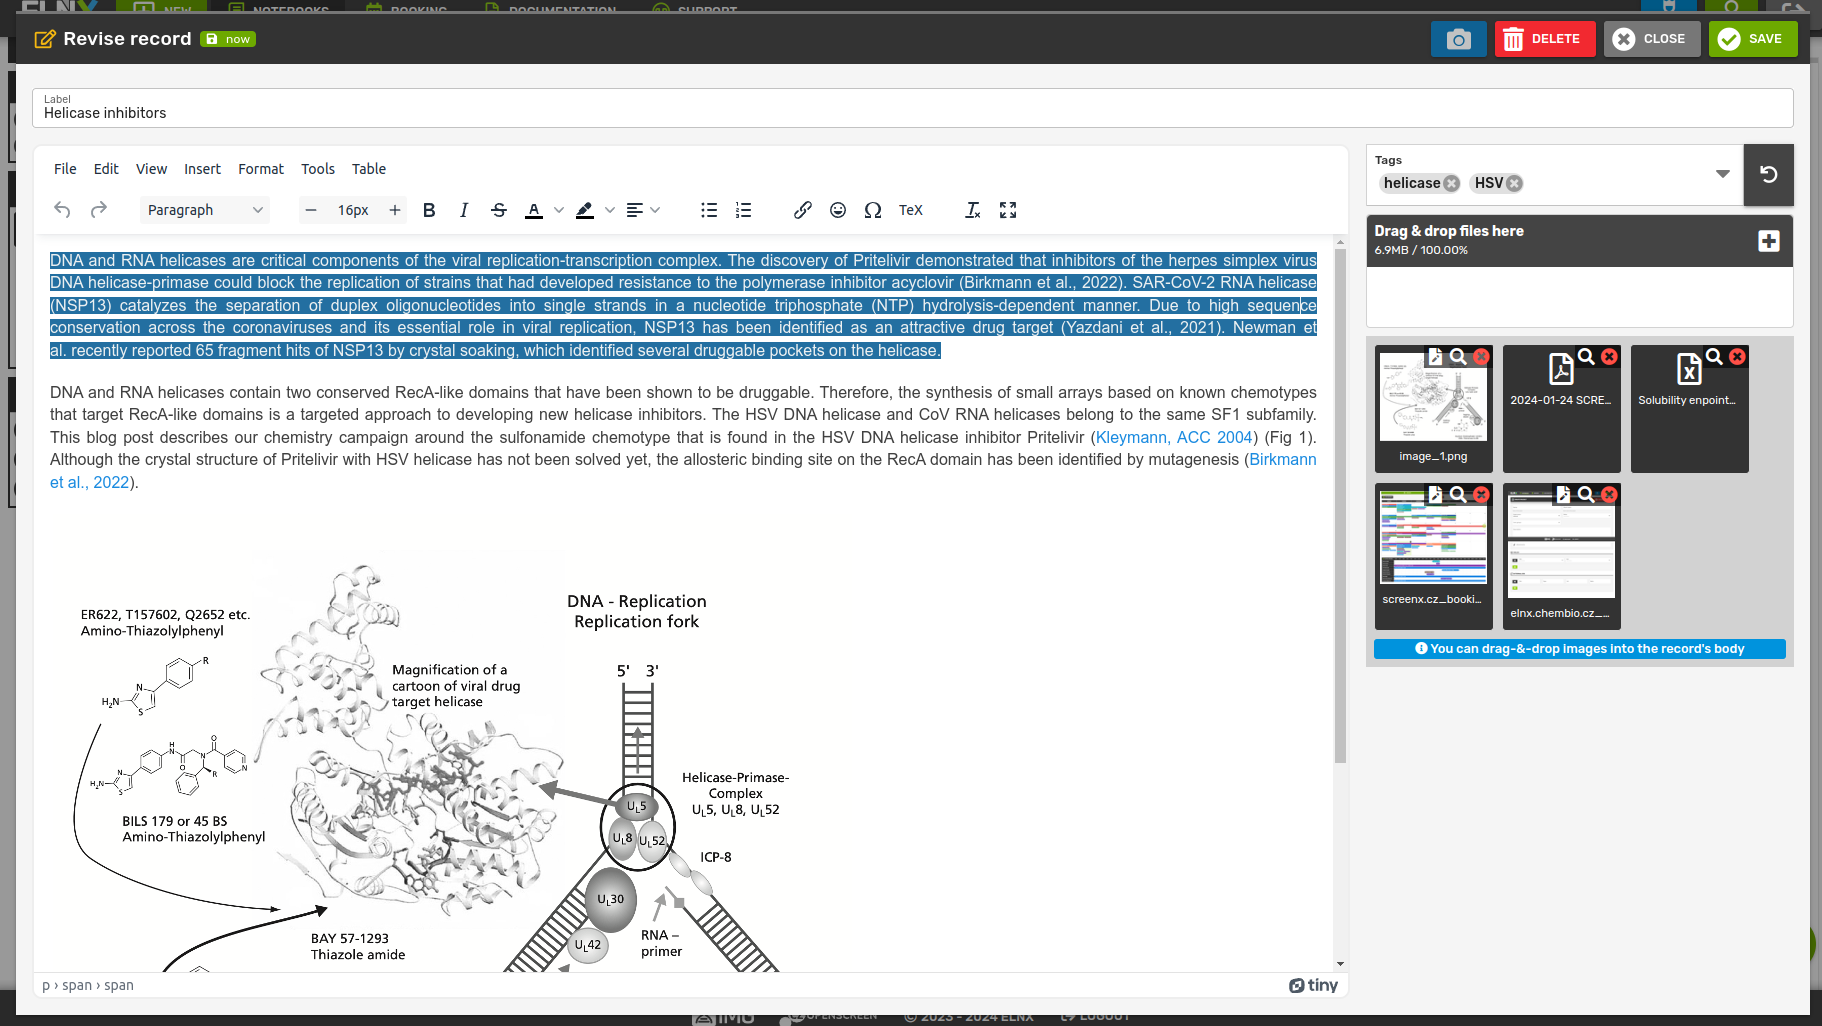
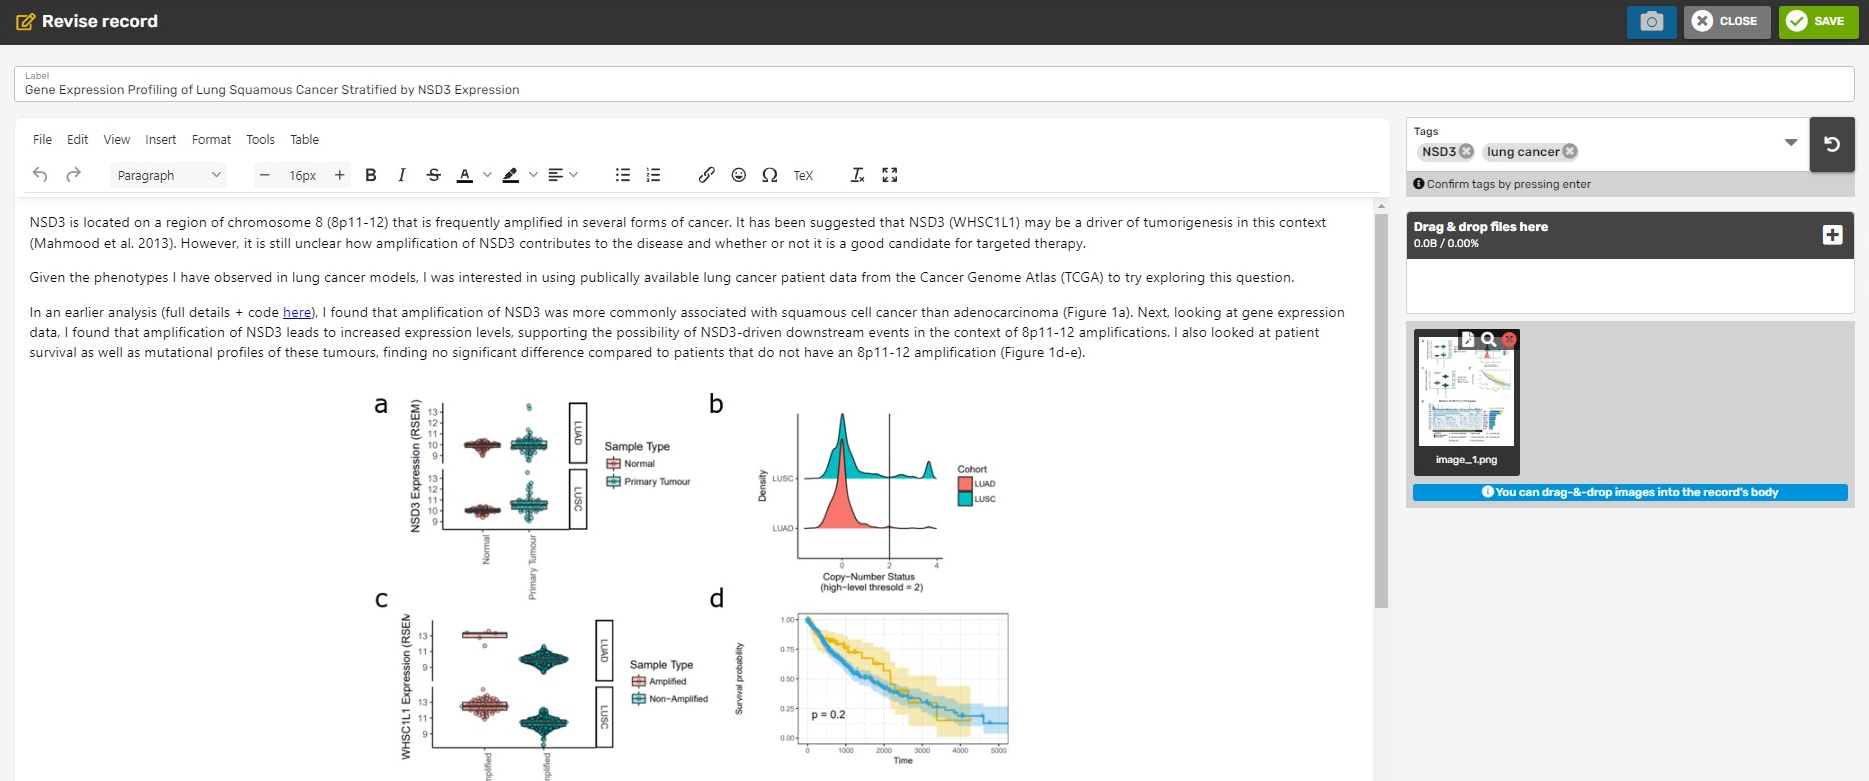
New notebook record can be created by clicking the Add record button in the navigation panel on top, or at the bottom-right corner of the page. This opens the New record form, which contains an input field for the label (the only mandatory field), a WYSIWYG editor for text/html, an input for attachments, and tags. On mobile devices, there is also a camera input which enables users to take photos that are directly attached to the record. While Label is a simple text field, in the main body (the WYSIWYG editor), you can either write or paste already pre-formatted text/html parts, images, tables, etc. When pasting from sources that support copying data both as html and image (e.g. from MS Excel), you can select how to paste the data. Just right-click on the pasted content, choose Paste as... and pick your preferred format. You can also drag-and-drop images into the record's body from the attachments section.

When copying text from another document, the html formatting is preserved. To increase compatibility, you can drop the formatting by clicking on Clear formatting in the control panel. You can also view the html code of the record in View → Source code.
Record concept
During the creation of a new record (or a new version of an old record), your work is automatically saved as a concept. This way, ELNX makes sure that you don't lose your work during a network connection loss, your device malfunction, or if you just need to interrupt your work for whatever reason. If such a situation occurs, you can easily continue with the record where you left off. The concepts are stored separately for each record and each user. While saved concepts of new/revised records can still be deleted (the Delete button at the top of the record form dialog), the record itself is stored permanently, with an appropriate timestamp.
Edit existing record
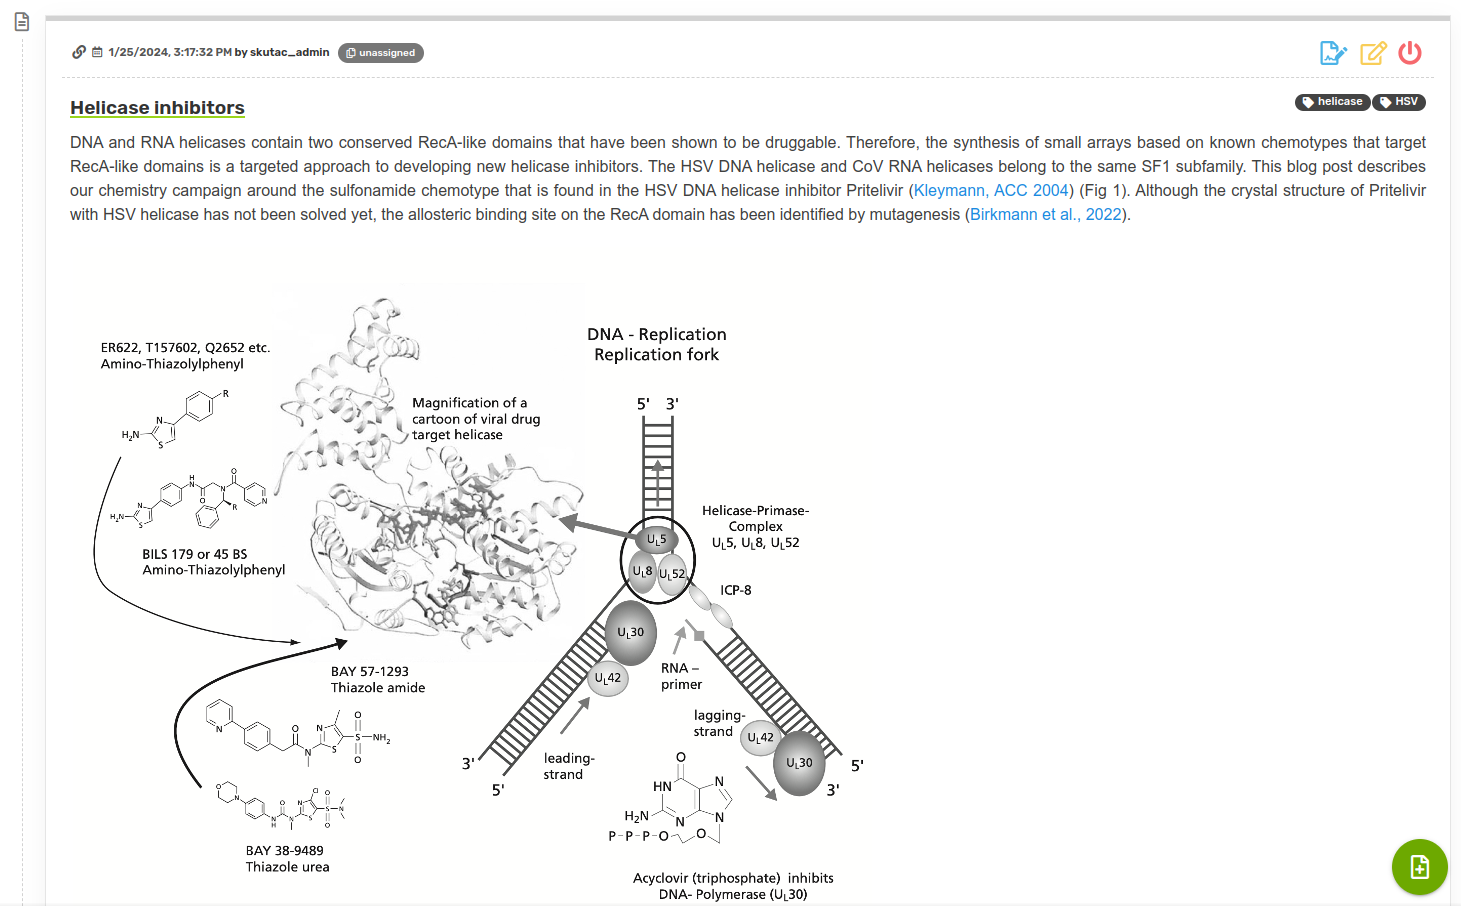
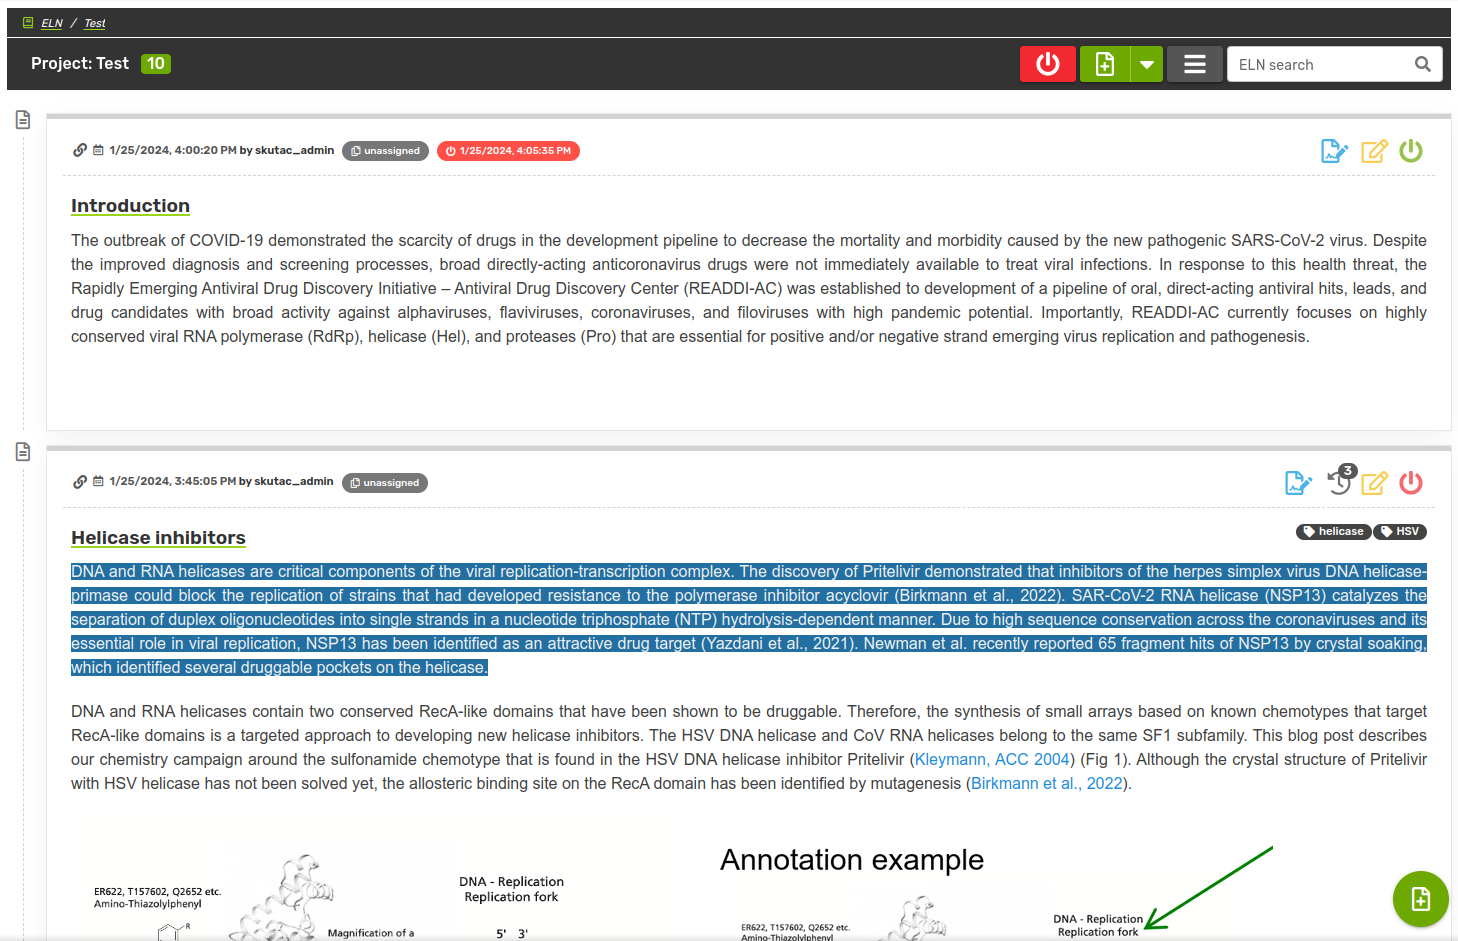
Records already saved in the notebook can be edited by clicking the Edit record button in the top-right corner of each record, or by double-clicking the body of the record (the record opens at the approximate position of the cursor). The original record is not changed by the edit and is saved as an older version of the record.
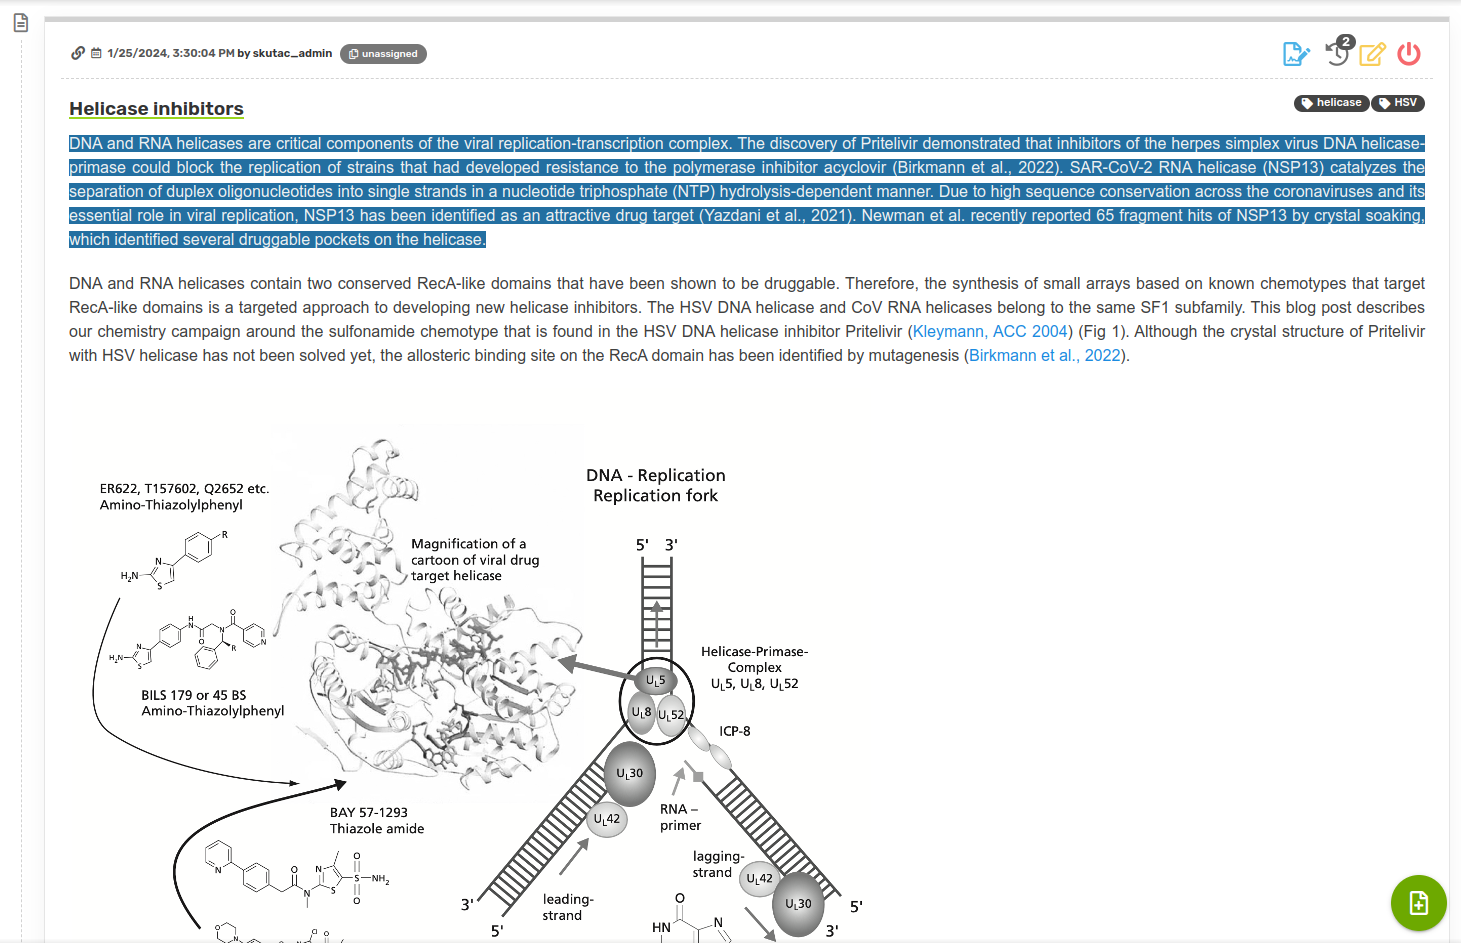
Older versions of the record can be browsed by clicking the Show history button in the top-right corner of the record (accessible if there is at least one older version). Ticking the Show diff toggle button highlights the differences between the currently viewed version and the previous/last version (added information is highlighted in green and removed information in red). Use the arrows on the left and right to view different versions.

Comments
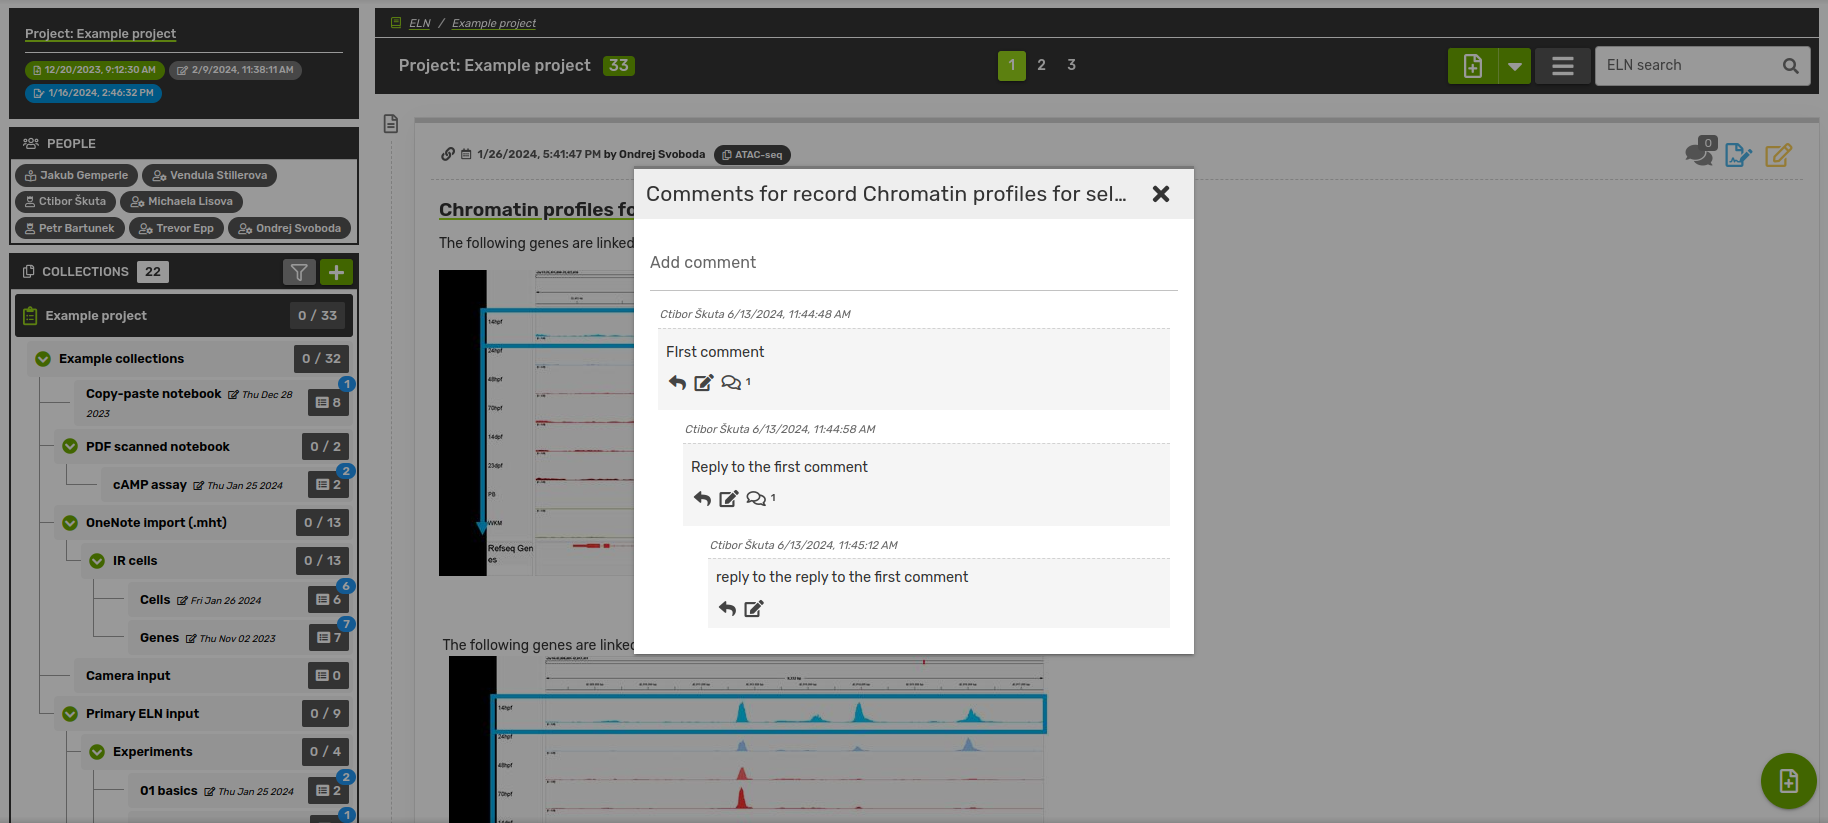
You can comment on a record by clicking on the Comments button in the top right corner of the record. This opens a view of all comments, where you can comment directly under the record, or reply to an existing comment. Comments can be edited by the user who created them.
Sign record
Records can be signed by project supervisors, by clicking the Sign record button in the top right corner of each record. This will apply a log with the name of the signee and a time stamp to the record. Alternatively, all records in a collection can be signed at once by selecting Sign all in the records menu (see below for more information).
Hide record
Records can never be deleted, however, they can be hidden by the owner of the record (the user that created the first version of the record), by selecting Hide record (power switch icon) in the top right corner of the record (the icon is visible only if the user can hide the record, i.e., is the owner).
Record attachments
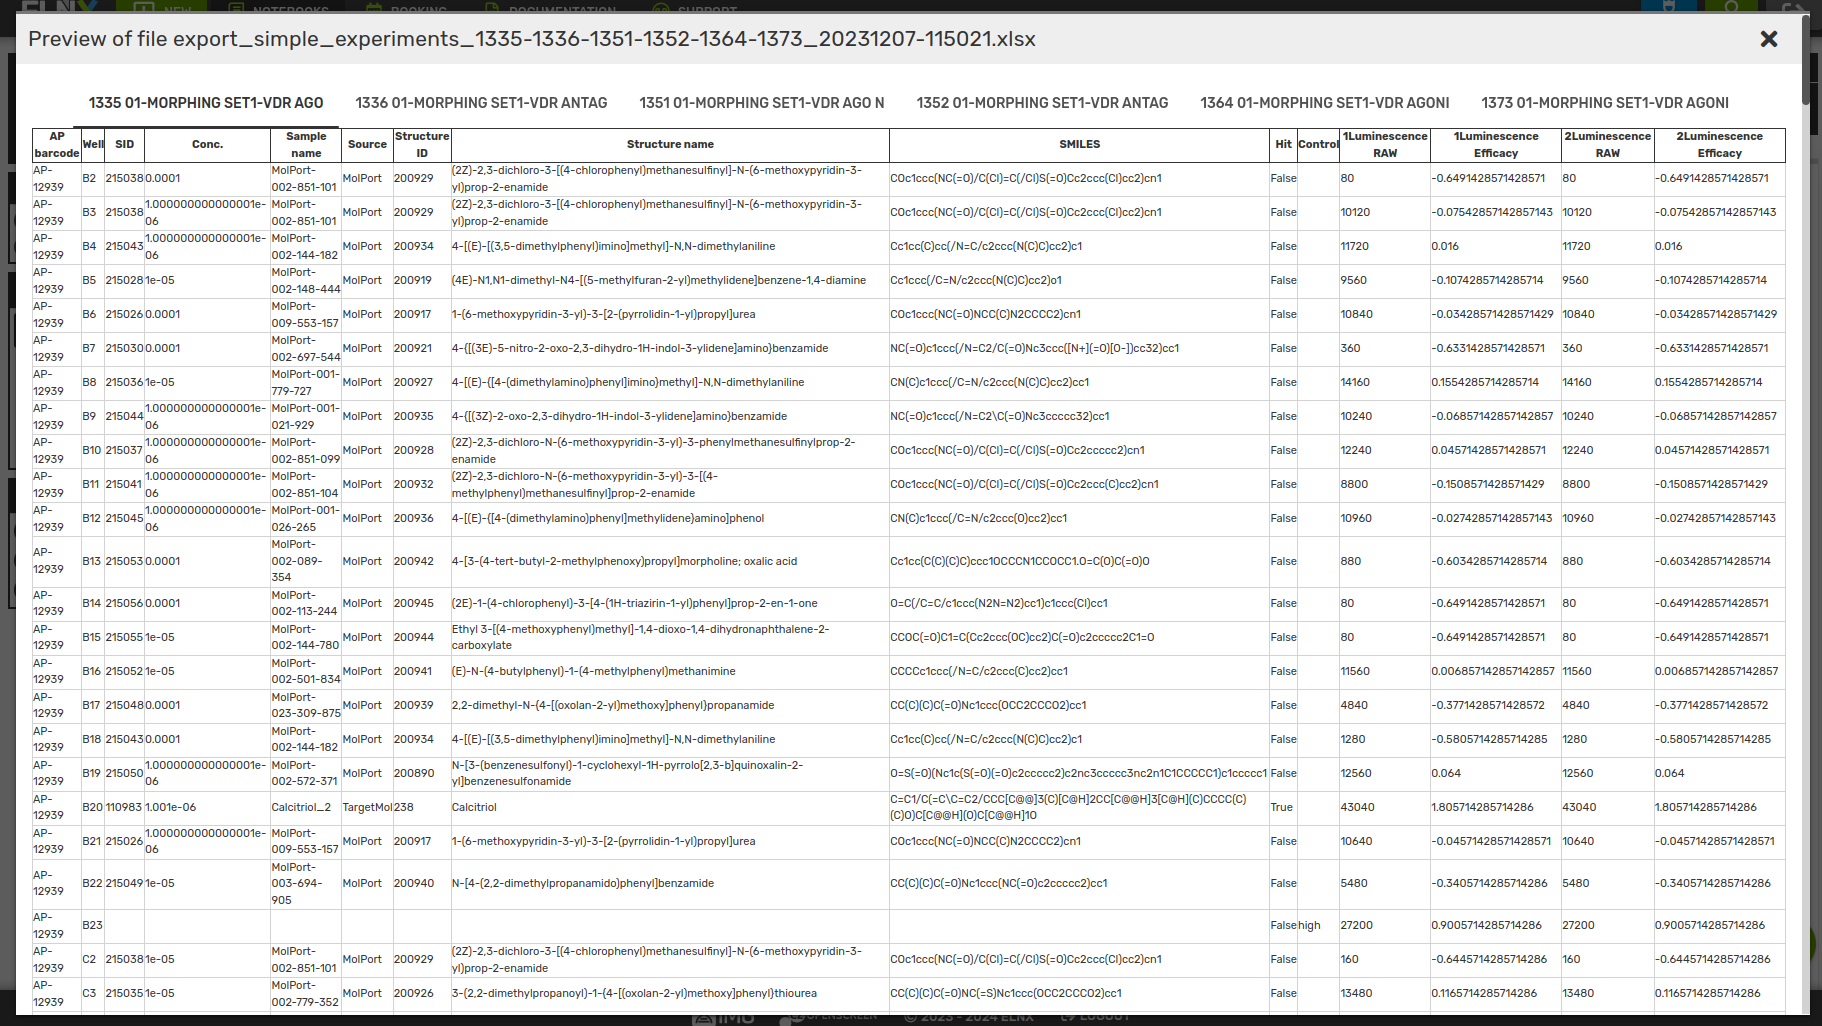
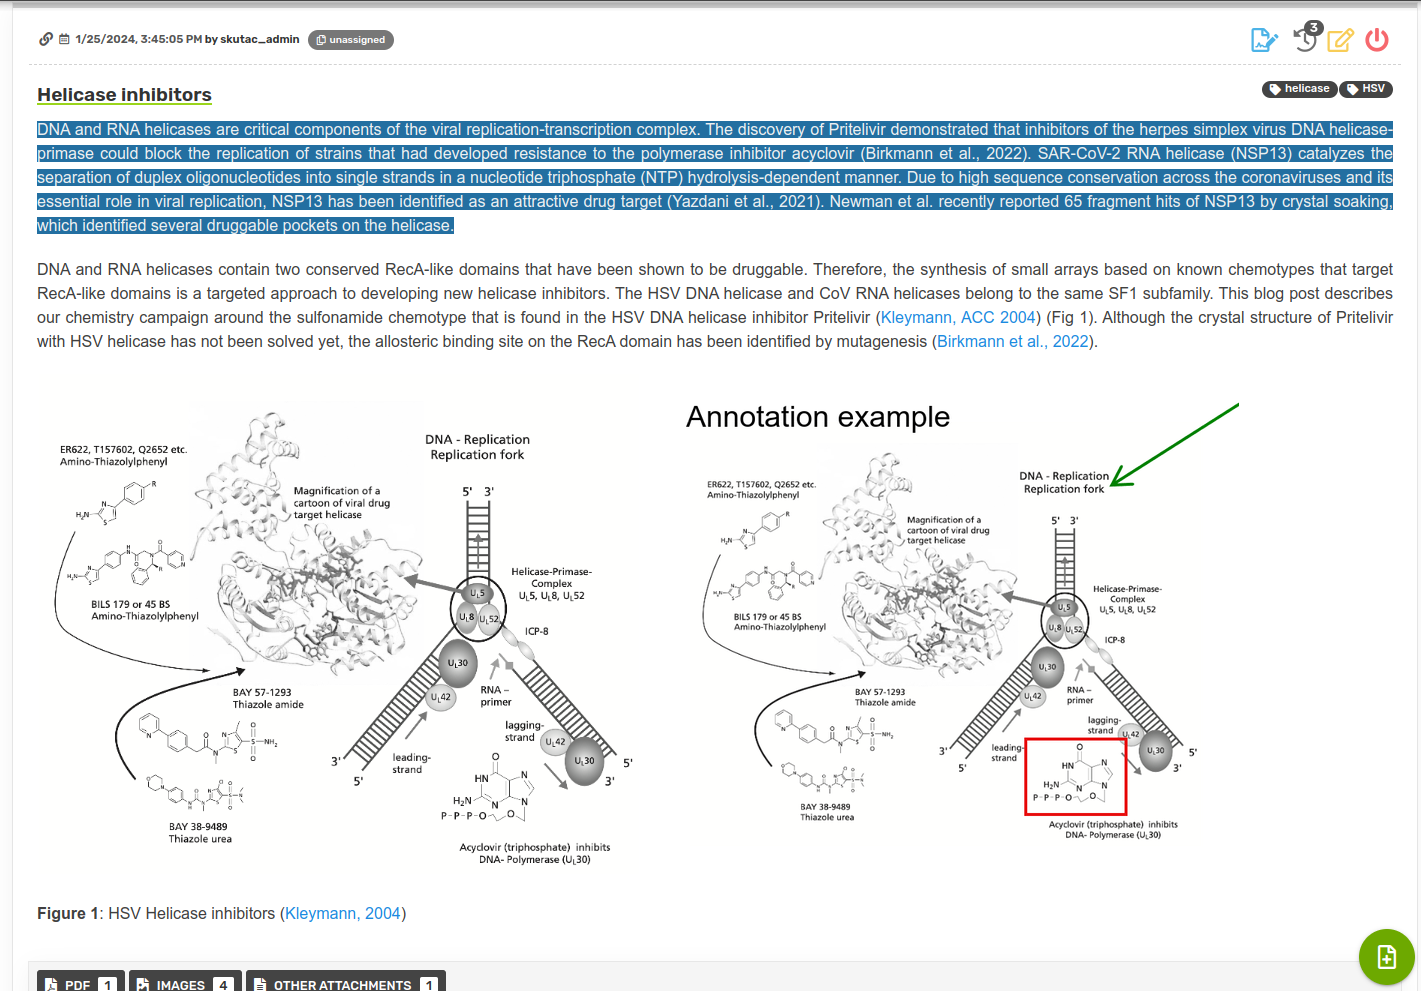
Any number of file attachments can be attached to a record (both new record and during editing). The maximum size per file is 25 MB. Selected file formats (pdf, xlsx, csv) have an in-app viewer, which can be used to browse the document. Images (both uploaded and captured straight from the camera) can be edited/annotated and inserted into the record's body.
To insert the image into the record body, just drag-and-drop it from the attachments section to a specific part of the record. You can also insert it directly to the record body and it will be automatically added as an attachment. If the image is large, you will be asked if you want the full-size image included in the record body, or just a smaller thumbnail. Using thumbnails is recommended as it keeps the file size of the record body small (using thumbnails will not influence the quality of the images saved in the attachments section). Once the image is inserted, you can resize it based on your needs.
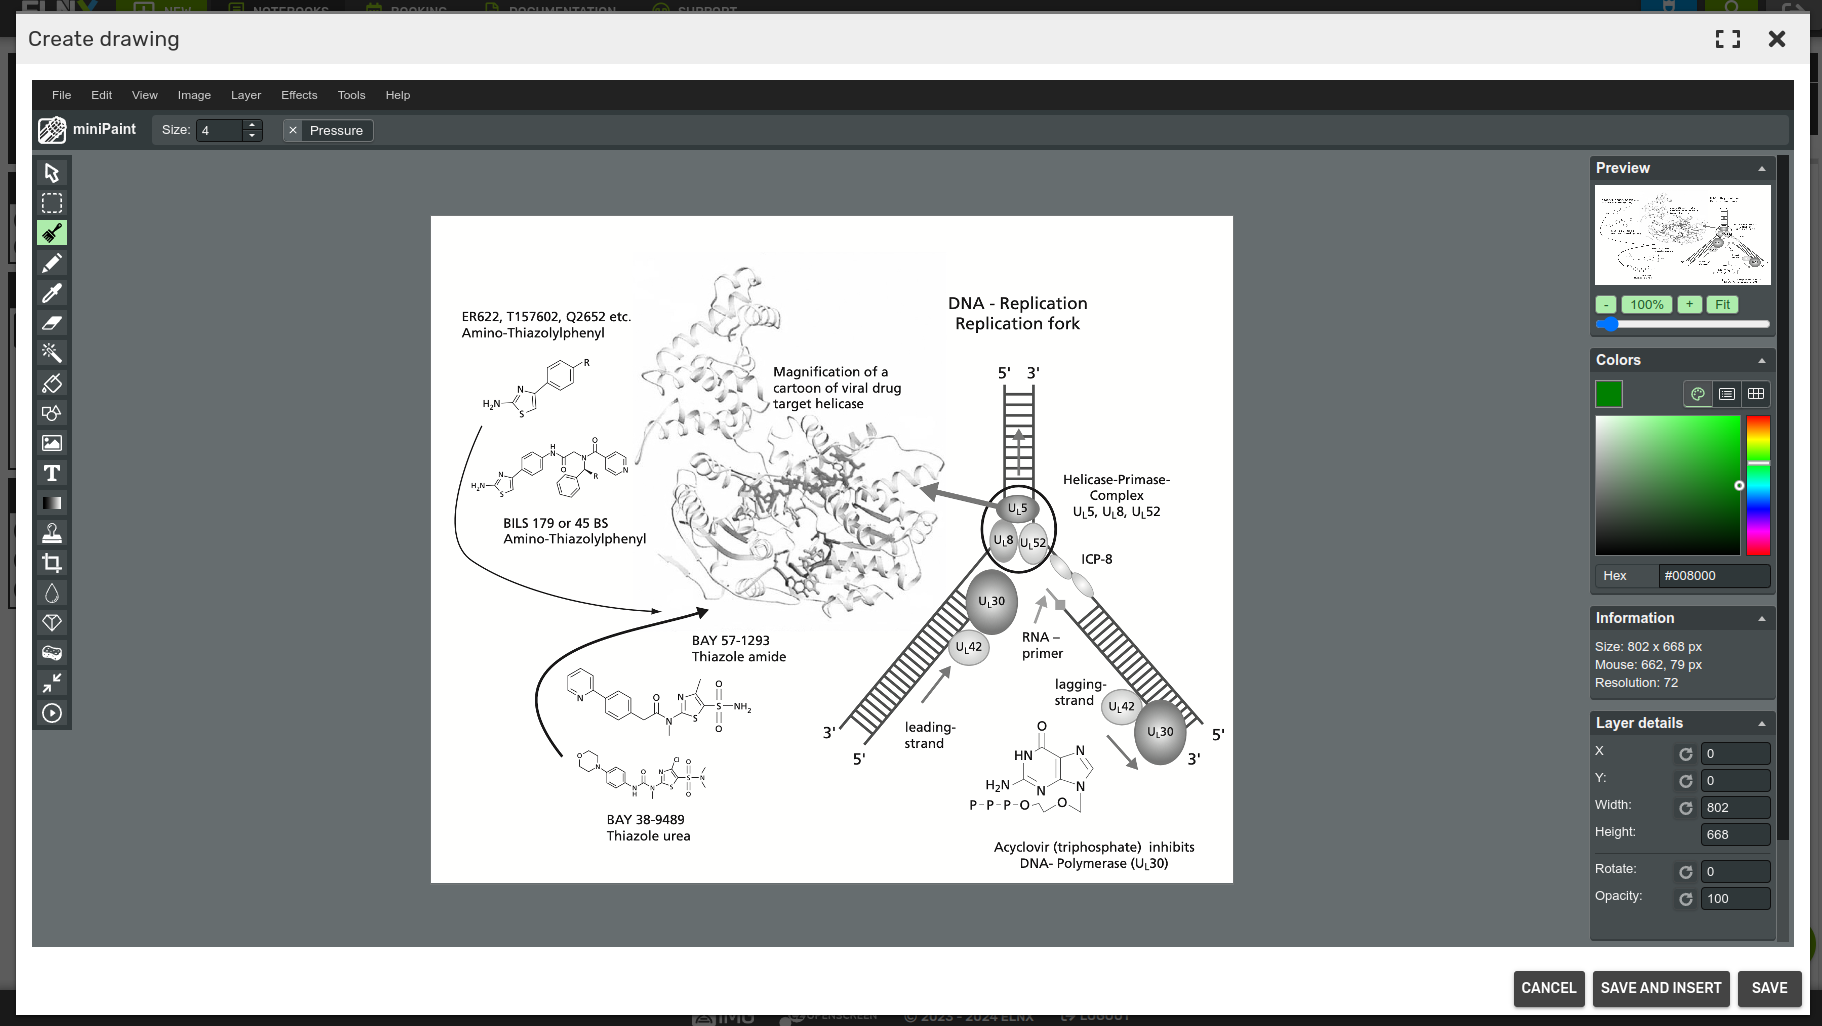
In case you want to edit the image before inserting it, click the Edit image button on top of the image thumbnail in the attachments section. The image opens in the Minipaint app where you can edit and annotate it.

To upload a video, click on Upload and convert video and select a file from the computer. The file will be added as an attachment and can be inserted to the record body by drag-and-drop.
Zenodo
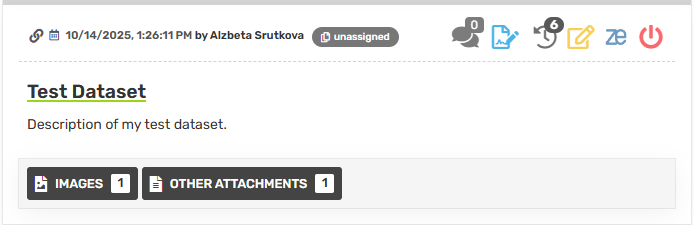
Attachments in a record can be published directly to Zenodo, an open research data repository. Zenodo assigns a permanent Digital Object Identifier (DOI) to each upload, making it easier for others to discover, cite and reuse your data. It supports a wide range of research outputs with no minimum size or specific format requirements. Publishing to Zenodo promotes open science and long-term data preservation, especially for research materials that don’t already have a DOI or dedicated repository.
To use this functionality, you need author permissions on the given record, a Zenodo account and a personal Zenodo access token. You can generate the token in your Zenodo account settings and paste it into the Zenodo access token field in your ELNX User Settings.

Clicking the Publish to Zenodo button on a record opens a dialog where you can review and edit the metadata that will be included with your upload. There are two publishing options:
- Save as draft - your attachments will be uploaded to Zenodo but will not be made publicly available. You can edit the draft and publish it later directly via your Zenodo profile. This option is also available for records without attachments, allowing you to create an empty deposit that can be populated with data when ready. Additionally, use this options if you want to add extra metadata in Zenodo that are not available through this dialog.
- Publish immediately - the attachments will be uploaded and published on Zenodo right away.
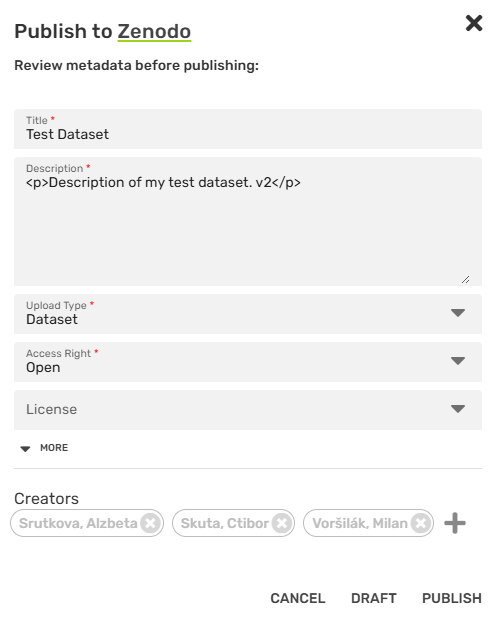
Once the upload is complete, a link to the Zenodo record is displayed, allowing quick access and verification.
Record Templates
It is possible to create custom templates associated with records. The two supported template types include:
- Content templates - define the layout and default content of a new record.
- Metadata templates - define the set of metadata fields that accompany a record.
To view and manage your templates, click Manage record templates (paper file button) next to New project in the notebook navigation panel, or click Templates in the WYSIWIG editor toolbar when creating a new record. This opens the templates menu, where you can switch between template types, and view and edit your templates. To create a new template, click New template at the top, or pick an existing template and click Clone template.
Templates can be shared with multiple users either by setting them as "public" (template will be visible to all users), or by assigning them to a specific user group (only users from the specific user group will see it). Users can only edit the templates they created, other templates can be only cloned.

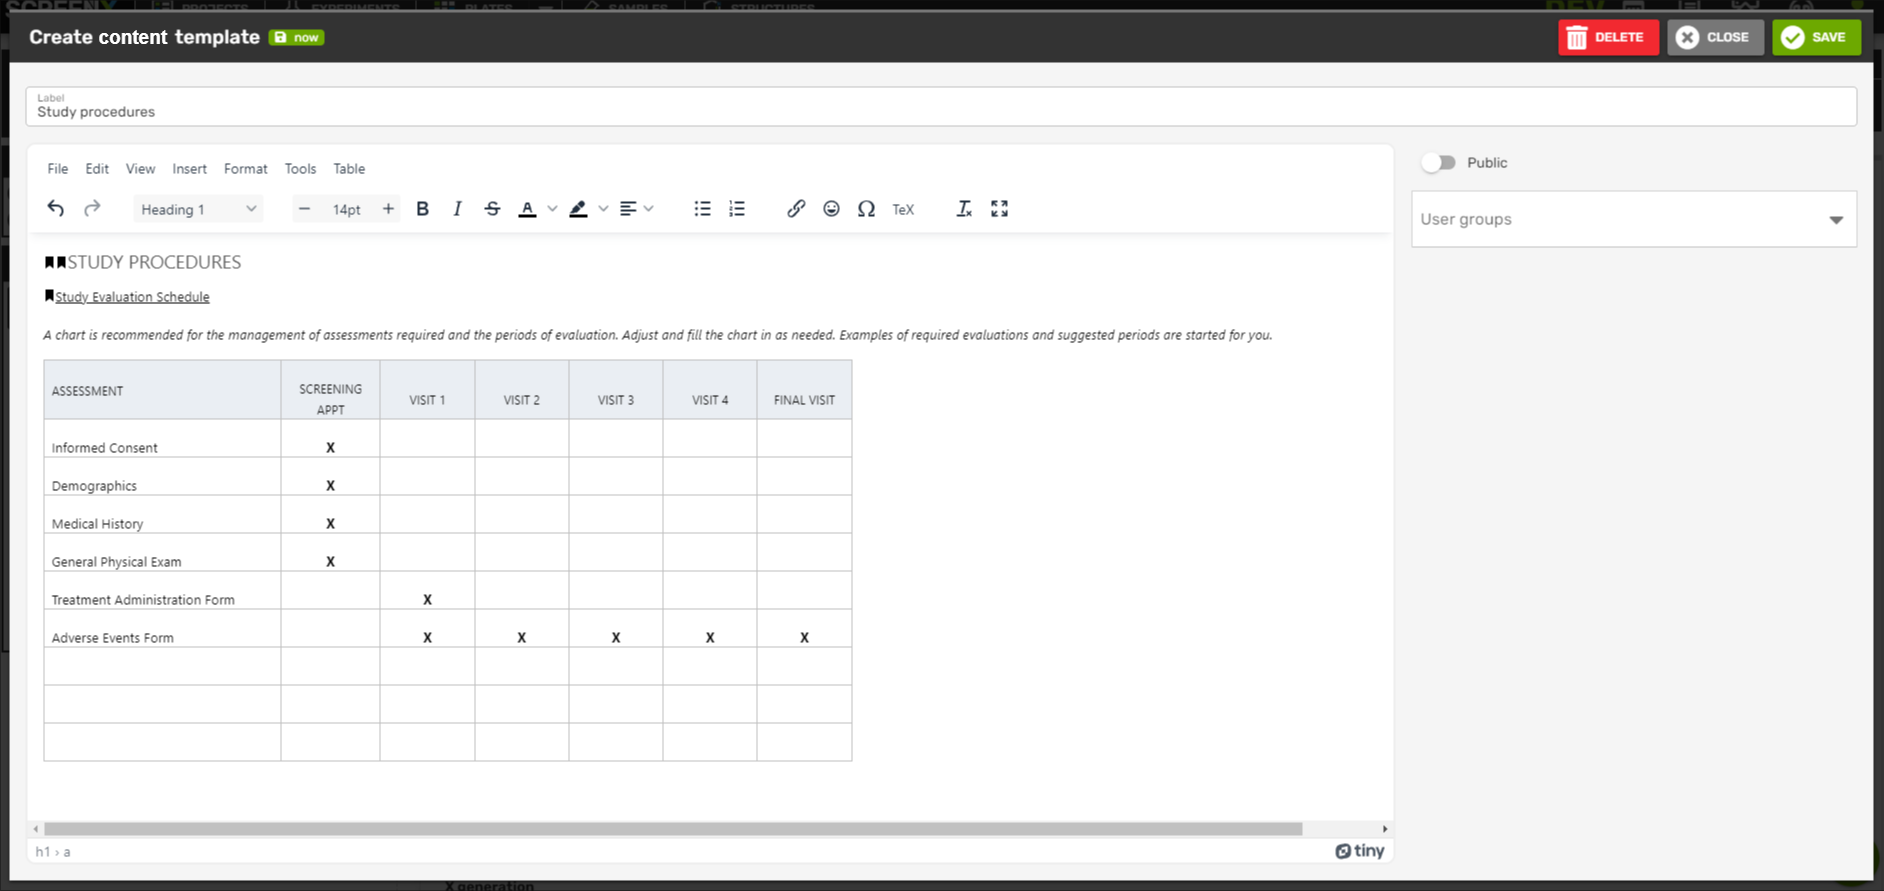
Content Templates
Record templates allow you to predefine the structure and default content of your records. They are especially useful for maintaining consistency across recurring types of entries, such as daily logs, experiment setups, or measurement reports. A record template can include predefined text, headings, tables, and other layout elements.
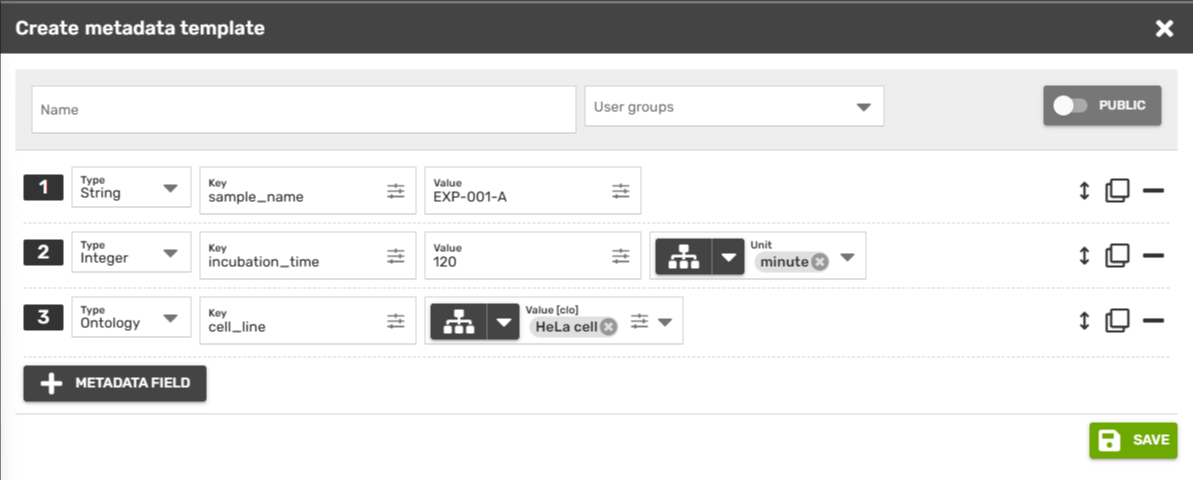
Metadata Templates
Metadata templates define the metadata properties of a record. They allow you to formally specify the fields that describe your data, in alignment with the FAIR data principles. To enhance semantic clarity and interoperability, each field can optionally be linked to an ontology. You can reference any ontology available through the Ontology Lookup Service.
Each metadata field in a template must have a defined type. Most field types are standard and include String, Integer, Float, Boolean, and Date. These are used for entering raw, unstructured values. When the ontology switch is enabled, these types can also be linked to standardized terms from an external ontology.
In addition to these standard types, there are two types with advanced semantic meaning: Select and Ontology. These types also support ontology linking, but their behavior is more structured.
The Select type allows the author to define a list of options from which users can choose. This is useful for fields such as status, priority, or category, where only specific values should be selectable. When the ontology switch is enabled, the list of options is retrieved from an ontology rather than being manually defined.
The Ontology type is designed specifically for selecting a term directly from an ontology. While other field types can also be ontology-linked, the ontology type is different in that the field itself is intended to represent an ontology term as its primary value. In this case, the field does not simply constrain a standard type with an ontology — it is semantically defined by the ontology itself.
Record actions
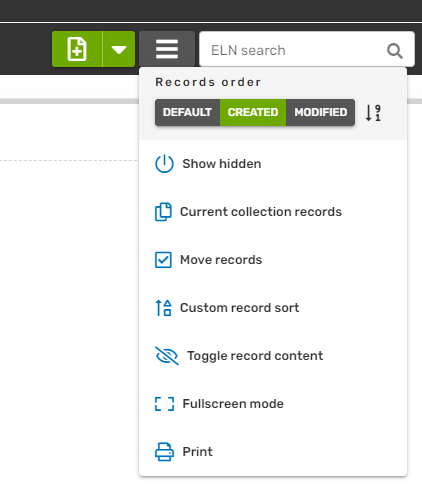
There are several actions that you can execute for the currently viewed notebook. While in the notebook, click the Records menu button at the top navigation bar.
-
Records order
- Change the order of records in the collection. The options are Default (order defined by the user, using the Custom record sort), Created (order by date of creation), and Modified (order by date of last modification). The last button switches between descending and ascending order.
-
Show hidden
- Reveals all hidden records. If you are the owner of the hidden record, you can make it visible again by the green power switch icon in the top left corner of the record.
Record actions - Show hidden -
Current collection records
- By default, if a collection containing subcollections is selected, you can see all records from the collection as well as its subcollections. If you want to see only the records assigned to the current collection, without its subcollections, you can use this action.
-
Move records
- Each record is always assigned to exactly one specific collection (or the project itself). Using this action, you can move one or more records from one collection to another. To move a single record you don't need to use this action - just drag the record by its header (Date - Author) and drop it onto a different collection in the collection tree. To move multiple records at once, you can select one or more records by checking the box (top-left) next to the record and then clicking the target collection in the collection tree. When you are done moving your records, leave the selection by clicking the red cross button, Cancel selection.
Record actions - Move records -
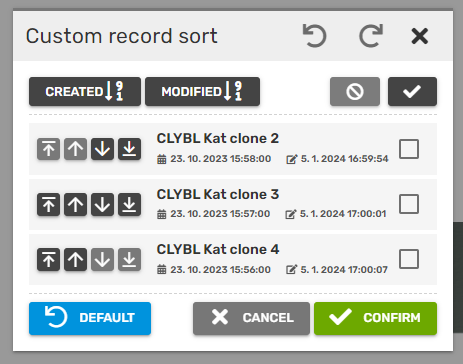
Custom record sort
- Using this function, you can create custom order of records within the collections. Open the window through the actions menu or by clicking the collection in the collection tree with the right mouse button. You can sort records based on the date when they were created or modified, in ascending or descending order. To move individual records, you can either drag and drop them or use the arrow buttons. You can also undo/redo the steps or reset the order to default. All users will be able to see these changes.
Record actions - Custom record sort -
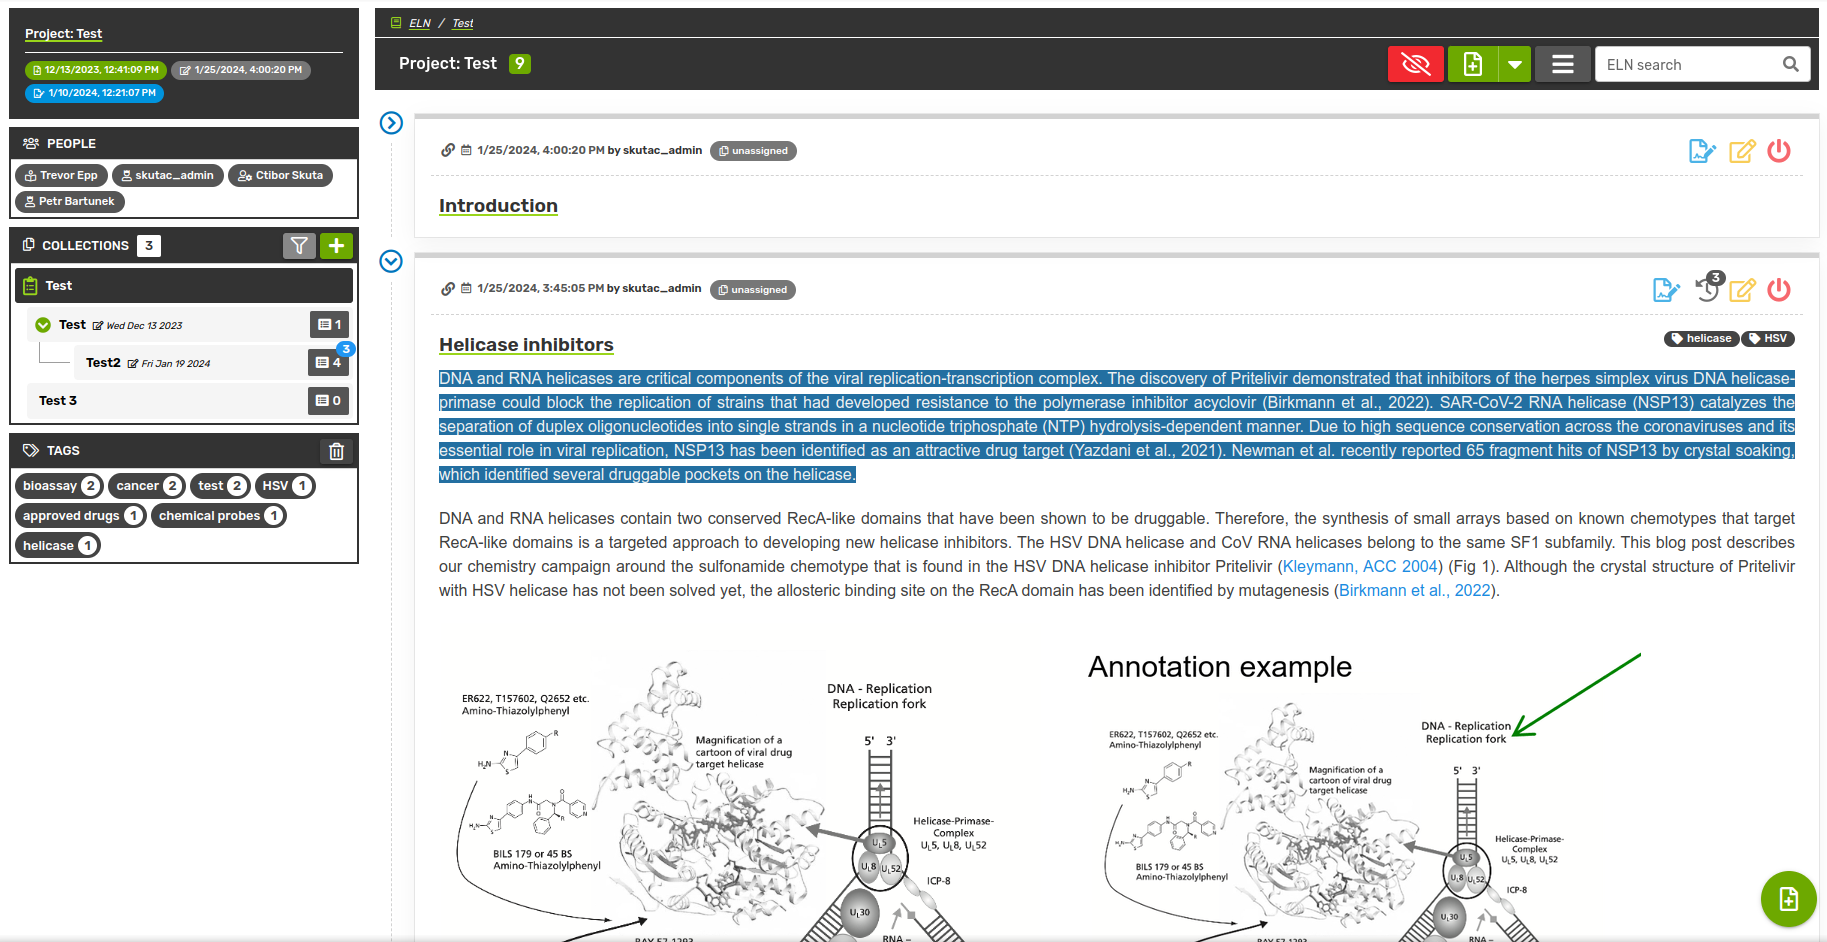
Toggle record content
- For better orientation, or if you want to move records, it is possible to toggle the visibility of record content. When hidden, only the header and label are displayed. While in this mode, you can un-toggle the content of a record by clicking the arrow button on its left side. To exit the toggle mode, you can use the shortcut button (slashed eye icon, Turn off record body toggle) on the top navigation bar.
Record actions - Toggle record content -
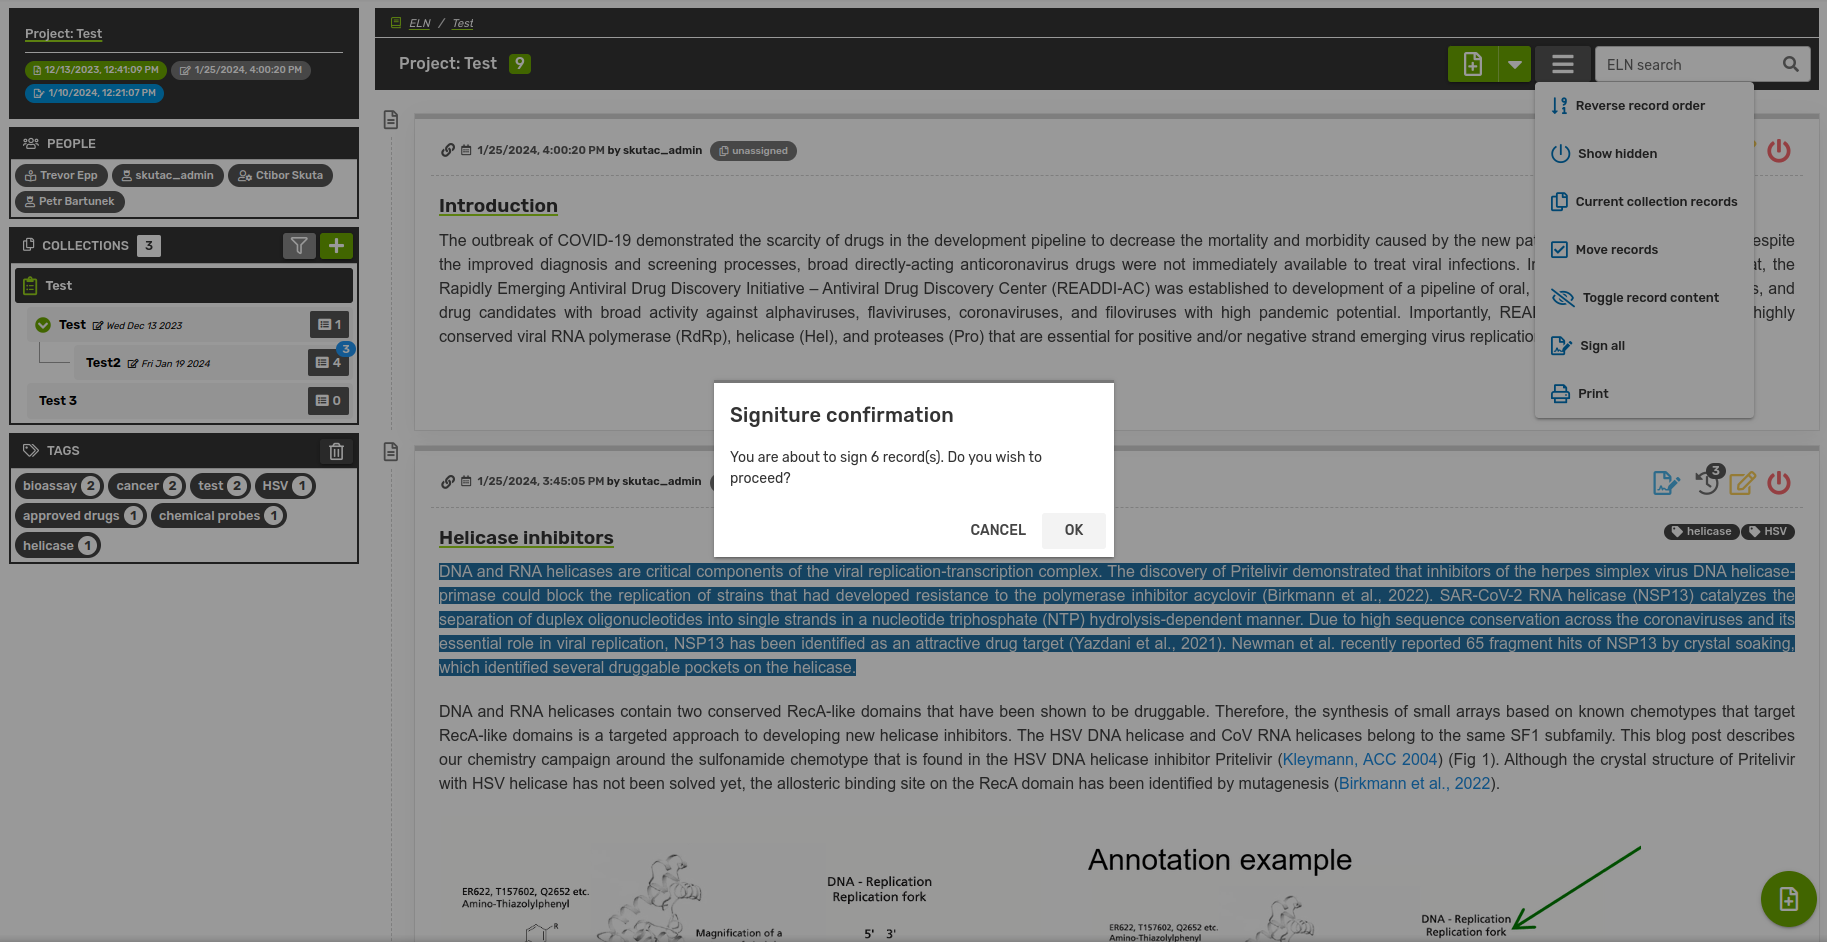
Sign all (only for supervisors)
- The supervisor can sign each record separately, or use this action to sign all unsigned records in the current position (notebook/collection). After clicking the Sign all button, the supervisor is asked to confirm this action (and the number of records that are going to be signed).
Record actions - Sign all records -
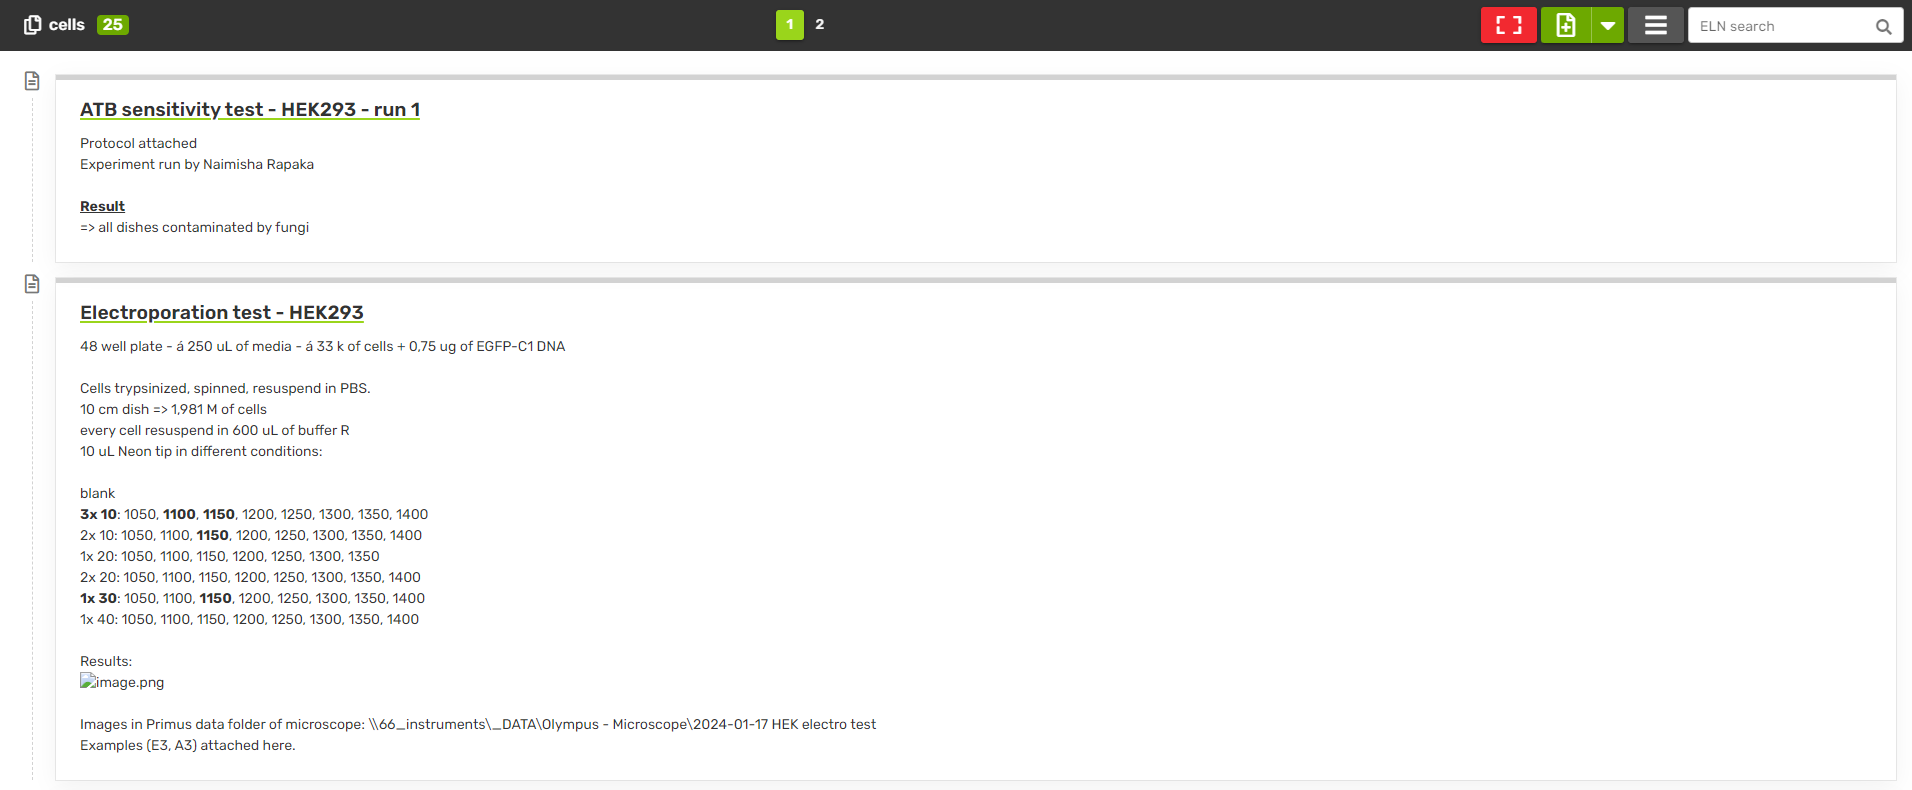
Fullscreen mode
- Fullscreen mode is the "presentation view" of the collection. All side panels and buttons are hidden and only the content of the records is shown (label and body). On the top panel, you can find the number of records displayed and switch between pages of the document. To leave the fullscreen mode, click the Turn off Fullscreen mode button on the top panel.
Record actions - Fullscreen mode -
Print
- The print action will invoke your default browser/system print dialog with the current record/page adjusted for printing by simplified stylesheets (buttons, menus/navbars, collection tree removed, etc.).

Record actions - Print -
Archive notebook
- This action allows you to export the entire notebook as a downloadable .zip file. The zipped notebook can later be imported back into ELNX and reopened as a fully functional notebook.
Record search
To search for a specific record or its version, you can use the search input in the top navigation bar of the notebook. Currently, the search is performed only in the text content of the records (label and body), the file attachments and their names are not included. You can search for a single or multiple sub-/strings at a time. To search for multiple terms or their substrings, just add a space between them (e.g., to find a record containing words chemical and kinase, you can use the query "chemical kinase" or even substrings "kin chem" - of course, the second query is more general).
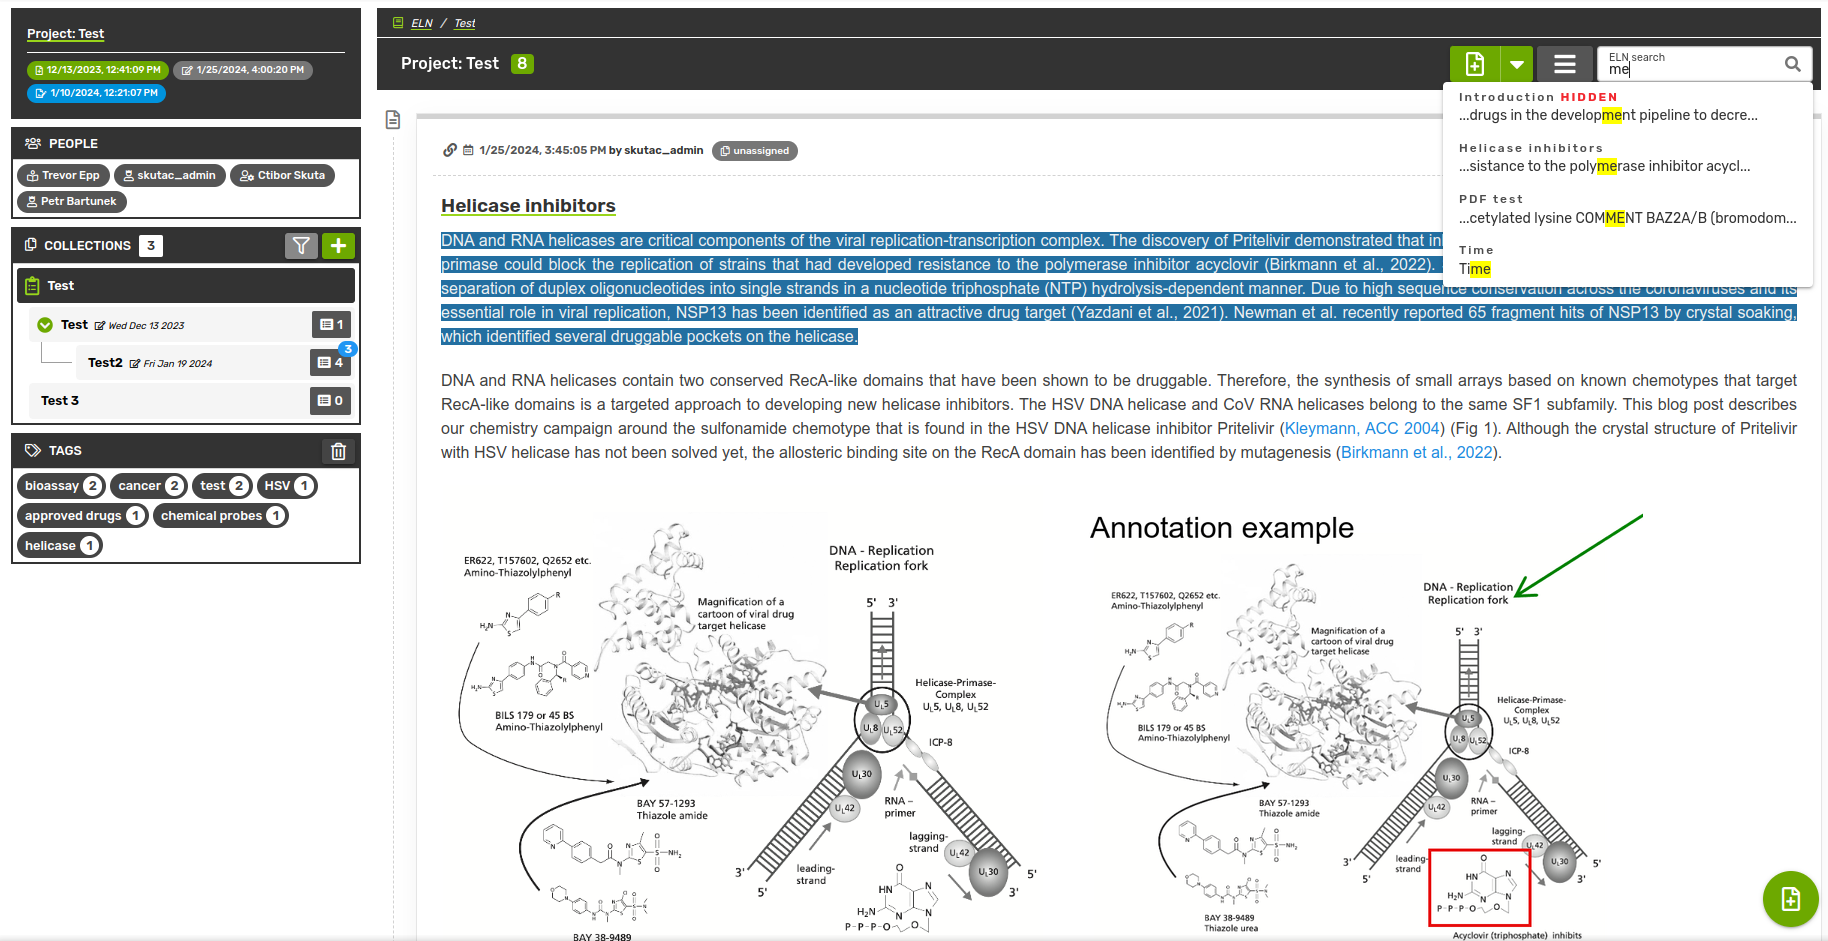
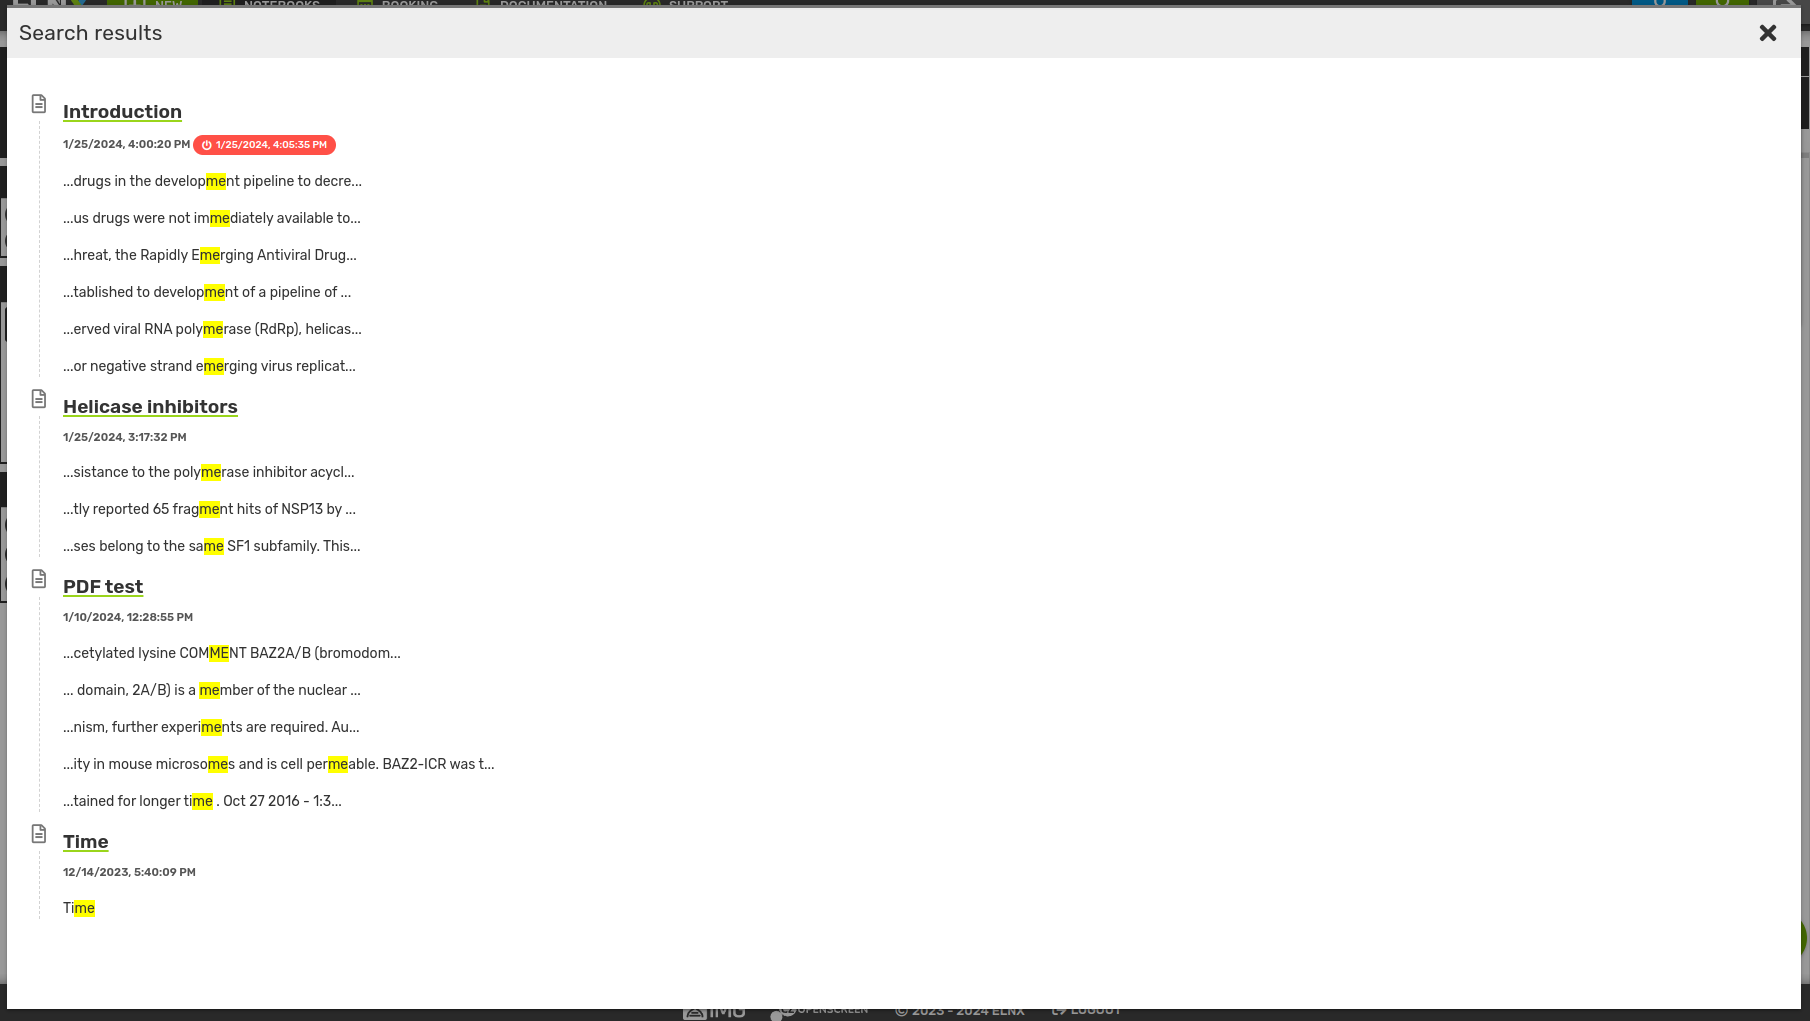
During the search, the matched records are displayed in real time in a drop-down selection. You can either pick a specific record from this selection, or press enter (with the focus on the input field) and you will get a list of all matched records with the matches highlighted.
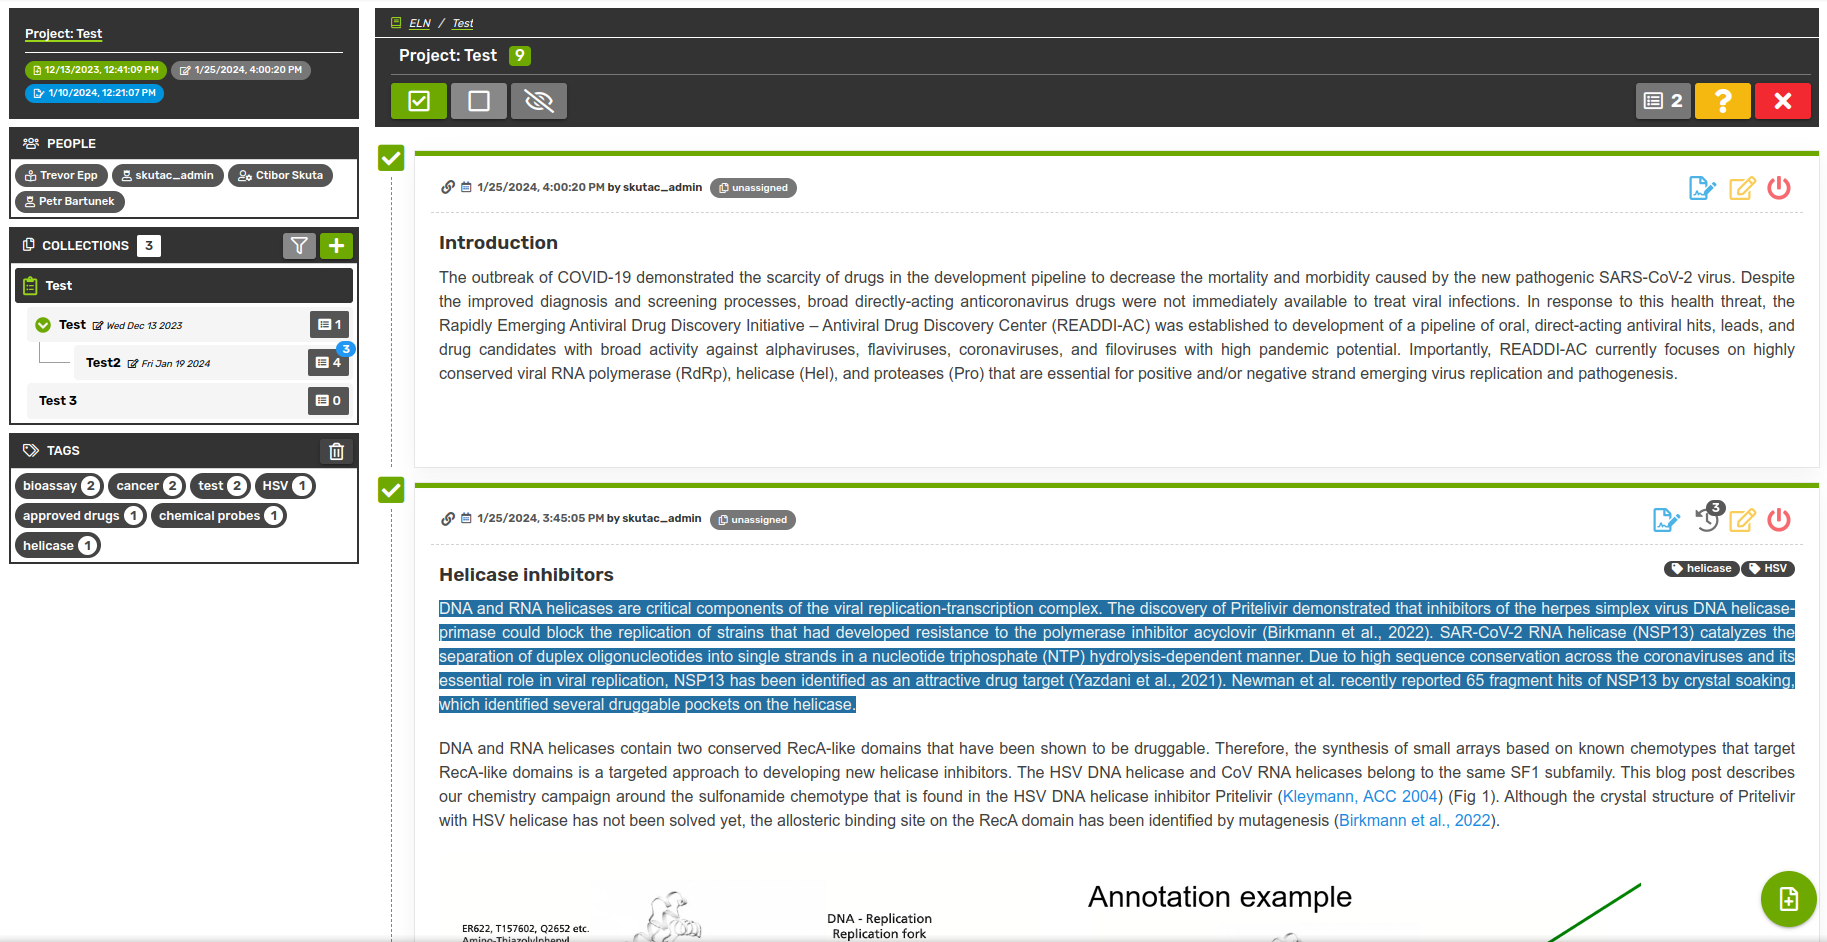
Tags
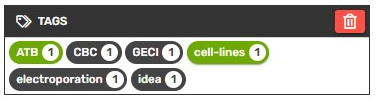
Another way of searching records is by their tags. Select an existing tag or add a new one in the Edit record window, then use the Tags tab on the left bar to filter through your records and collections. The search will only contain results from your current position in the collection tree (current collection and its children).
Backup
All data are automatically backed up twice a day by the IT support. In case of any incident or data loss, your data will be restored from the last backup.