Projects/Notebooks
The notebooks in ELNX are directly connected to user projects in a one-to-one fashion (one notebook for one project). It can be structured through Collections, which hold the individual Records.

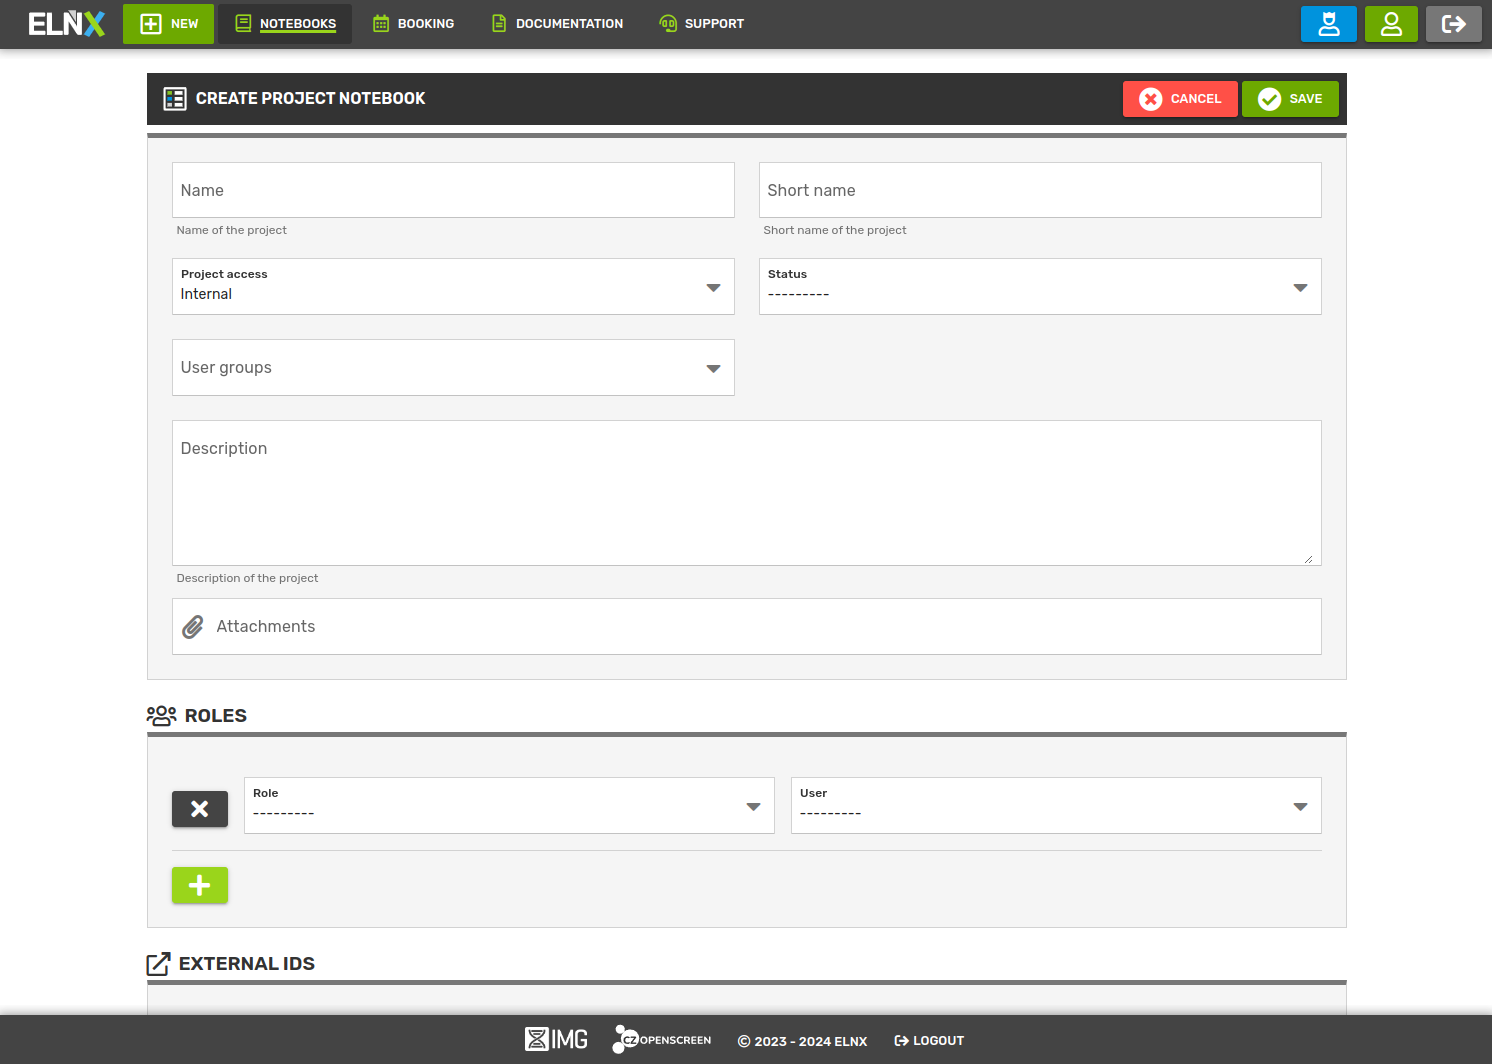
Add new project notebook
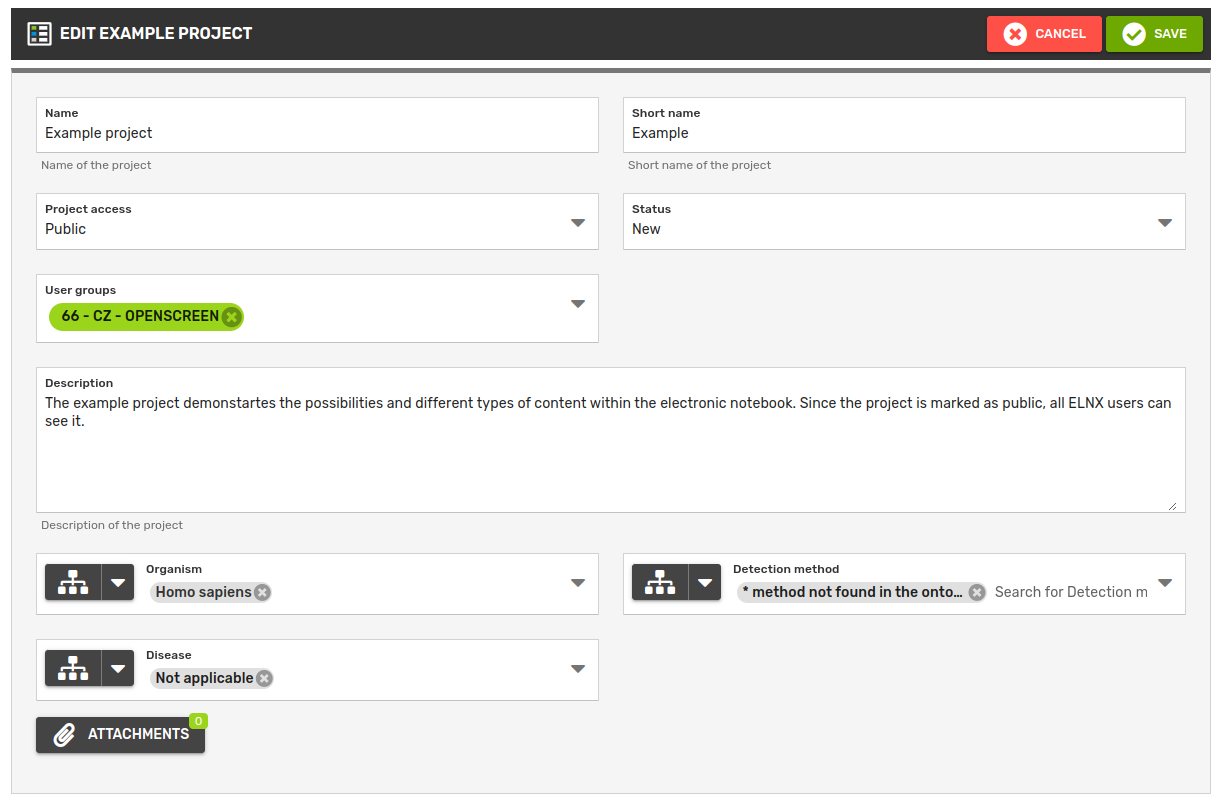
A project notebook can be created by clicking the Add new project notebook button in the main menu of ELNX. This leads to a form that contains information about the project: its name, description, status, and most importantly the users and their roles.
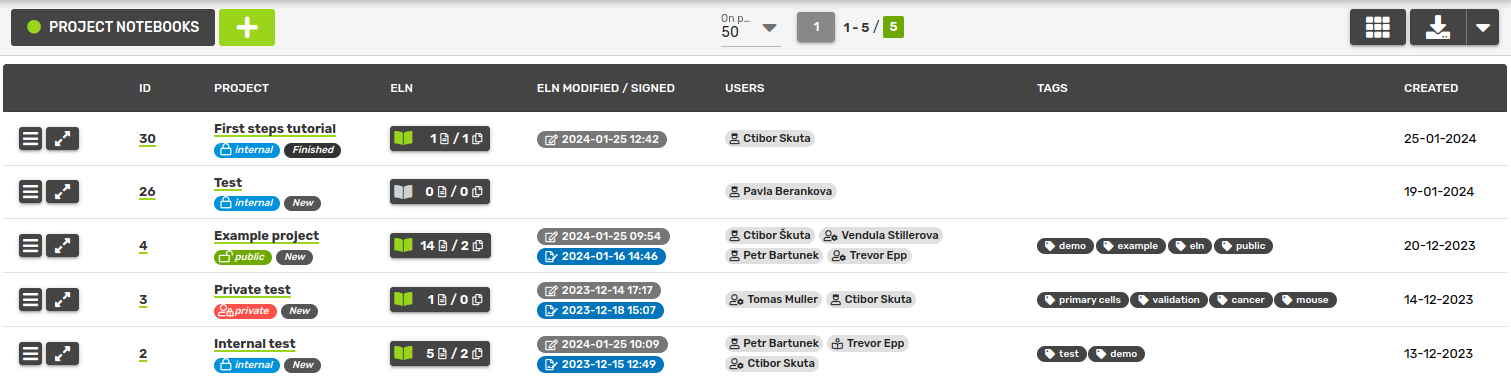
Accessibility - public vs. internal vs. private
Based on the Access type of the project, the notebook is visible and accessible to different user groups:
- public - anyone with a user account in ELNX can see the project/notebook, even users from other user groups (labs)
- internal - all users within the group (lab) owning the project
- private - only users directly associated with the project/notebook
Ontologies
In line with the concept of FAIR data (see FAIR principles), ELNX supports the use of ontologies to describe your projects. Any ontologies available in the Ontology Lookup Service can be used.
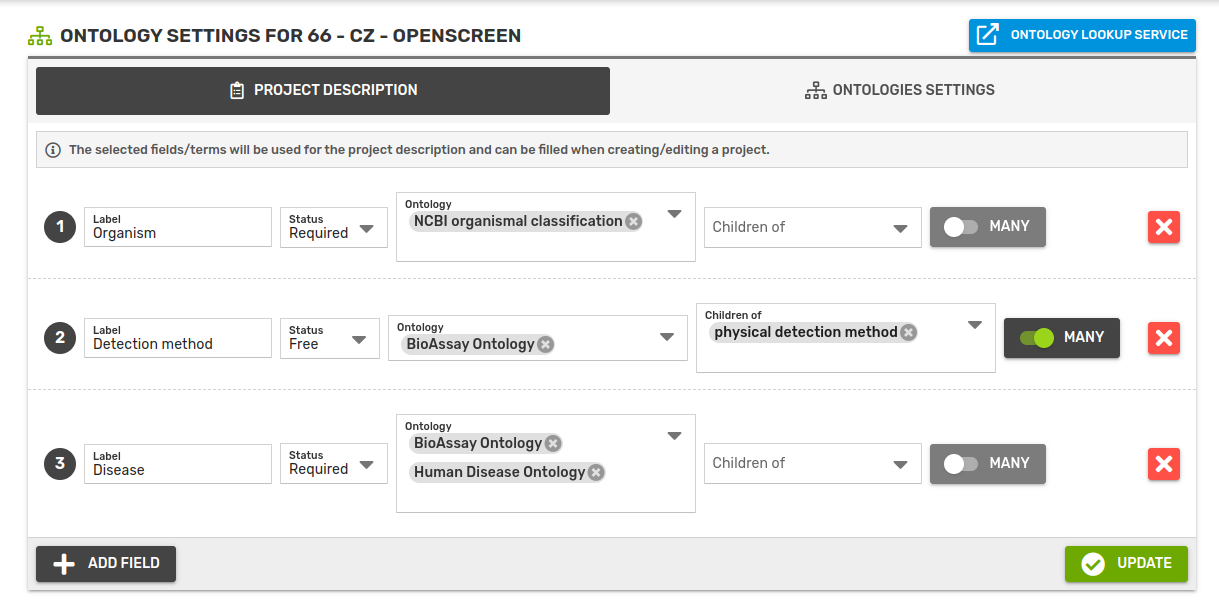
To start using ontologies in your projects, first update the ontology settings which are common for all projects of the workgroup. In the notebook/project browse view, go to the action menu and select Ontology settings for a workgroup. Here, you can define the fields that will be available in the ontology section of the workgroup's projects.
- label - name that describes the type of ontology, e.g. cell line, assay stage
- status - describe if the field is required/optional
- ontology - which ontology will be used (all ontologies from the Ontology Lookup Service are available)
- children of - here you can select the branch of the ontology that will be used (i.e. only children of this sub-section can be looked up and selected in the field)
- many - choose if one / multiple values can be selected
If a required field doesn't fit for the description of a project, it can still be omitted by selecting Custom value from the drop-down selection. This value is used also to automatically fill in required ontology fields in older projects that were created before the ontology field was designed.
Any fields designed in Ontology settings will show up in the Create project form. The values can be viewed and edited in project detail, under Edit.
Ontologies can also be used in metadata templates, allowing you to define reusable fields that follow standardized naming. Learn more in the Metadata Templates section.
Note: The ontology settings can only be updated by the head of the group. The head of the group can be set via the Admin interface.
User roles
Users can have different roles within the project. Currently, there are 5 roles predefined: researcher, project owner, supervisor, reader and external:
- researchers are the users working on the notebook, user with this role can add/revise the records and manage collections (add/delete/move)
- project owners have the same permissions as researchers with extra permission to edit the project
- supervisors have the same permissions as project owners with one extra permission - to sign/witness the notebook
All group/lab heads have by default the supervisor role in all projects.
- readers can access and view the project/notebook but nothing else
- external have the same permissions as readers; however, unlike readers, they are not part of any user group
Only users from the selected user groups (or externals) can be given a role, but not all users have to have one.

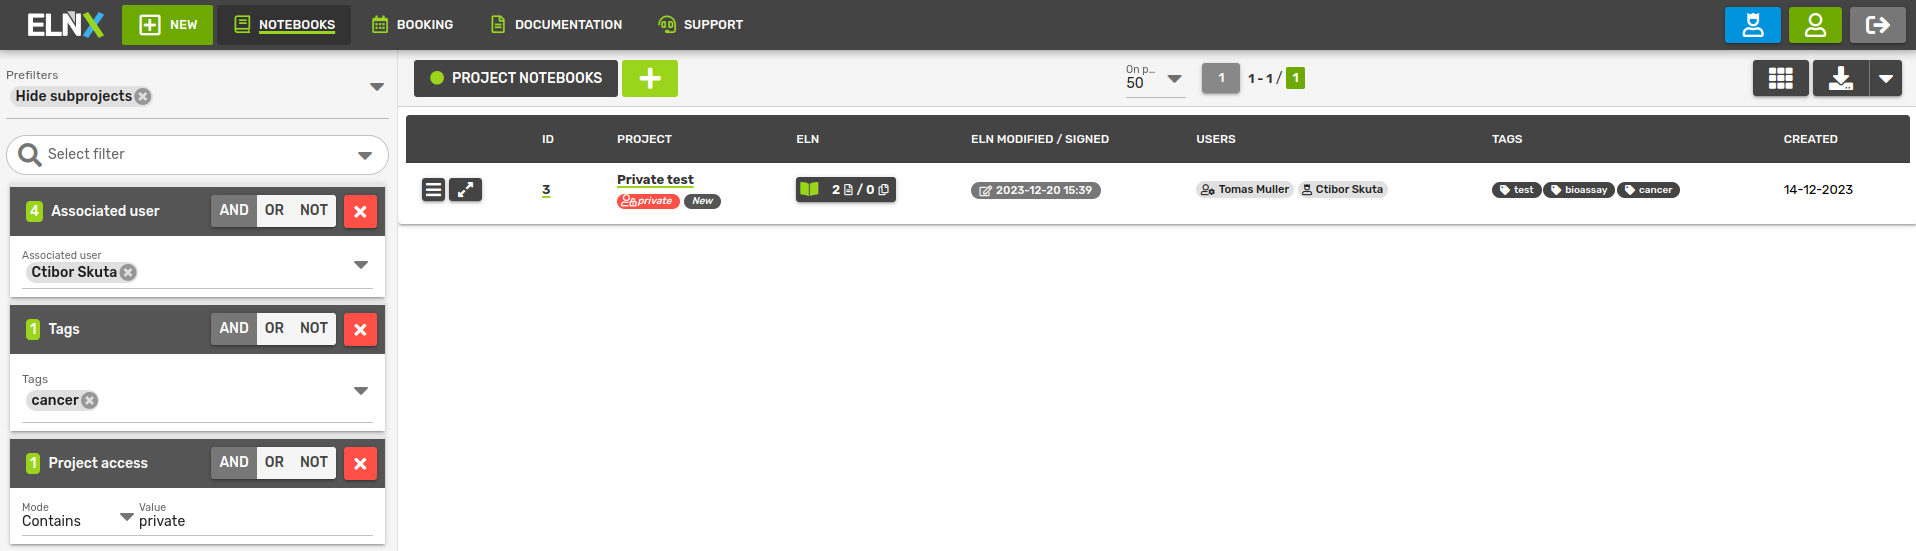
Project/notebook filtering
In the browse view of projects/notebooks, you can filter projects by applying one or more queries on the project metadata. Clicking on the arrow in the Select filter field opens a drop-down menu of all available filter types (project ID, name, tags...). Besides the predefined filters, you can also use a general full-text filter - just write the query in the Select filter field and press enter.
Current filters are listed on the left navigation tab where they can be deleted or further adjusted using the Boolean operators (AND - intersection, OR - union, NOT - difference).
Current filters can be saved as a custom filter by clicking on Save at the top of the panel. You can load your current filters from the drop-down Prefilters and custom filters. Any filter settings can be shared by copying the url address in your browser.